KKBP material breakdown
This page will fully break down the material node logic for KKBP 8.0’s “KK General” material shader. The simple node logic in the KK General material is used throughout the entire project, so reading and understanding this page should allow you to learn how to fix or debug any KKBP material you encounter.
Before you begin…
A large amount of cards were chosen at random and tested during the development of KKBP 8.0.
Out of 133 cards…
- 104 (78%) worked out of the box
- 22 (17%) had odd material issues that took 5 minutes to fix
- 5 (4%) exported but did not import
- 1 (0.5%) had odd material issues that would likely take someone a while to figure out
- 1 (0.5%) did not export and crashed the game
This means if you’re having issues there’s a 94.5% chance reading the “Basic options” section below will help you fix the appearance of your model. It also means there is a 0.5% chance that you’ll have to dig through this entire thing to find out why a material isn’t looking the way it’s supposed to look.
And before you waste your time, please make sure you didn’t get an error
during the import process as described on the front page!
This page will not help you if your model imported with errors!
Basic shader breakdown
Intro
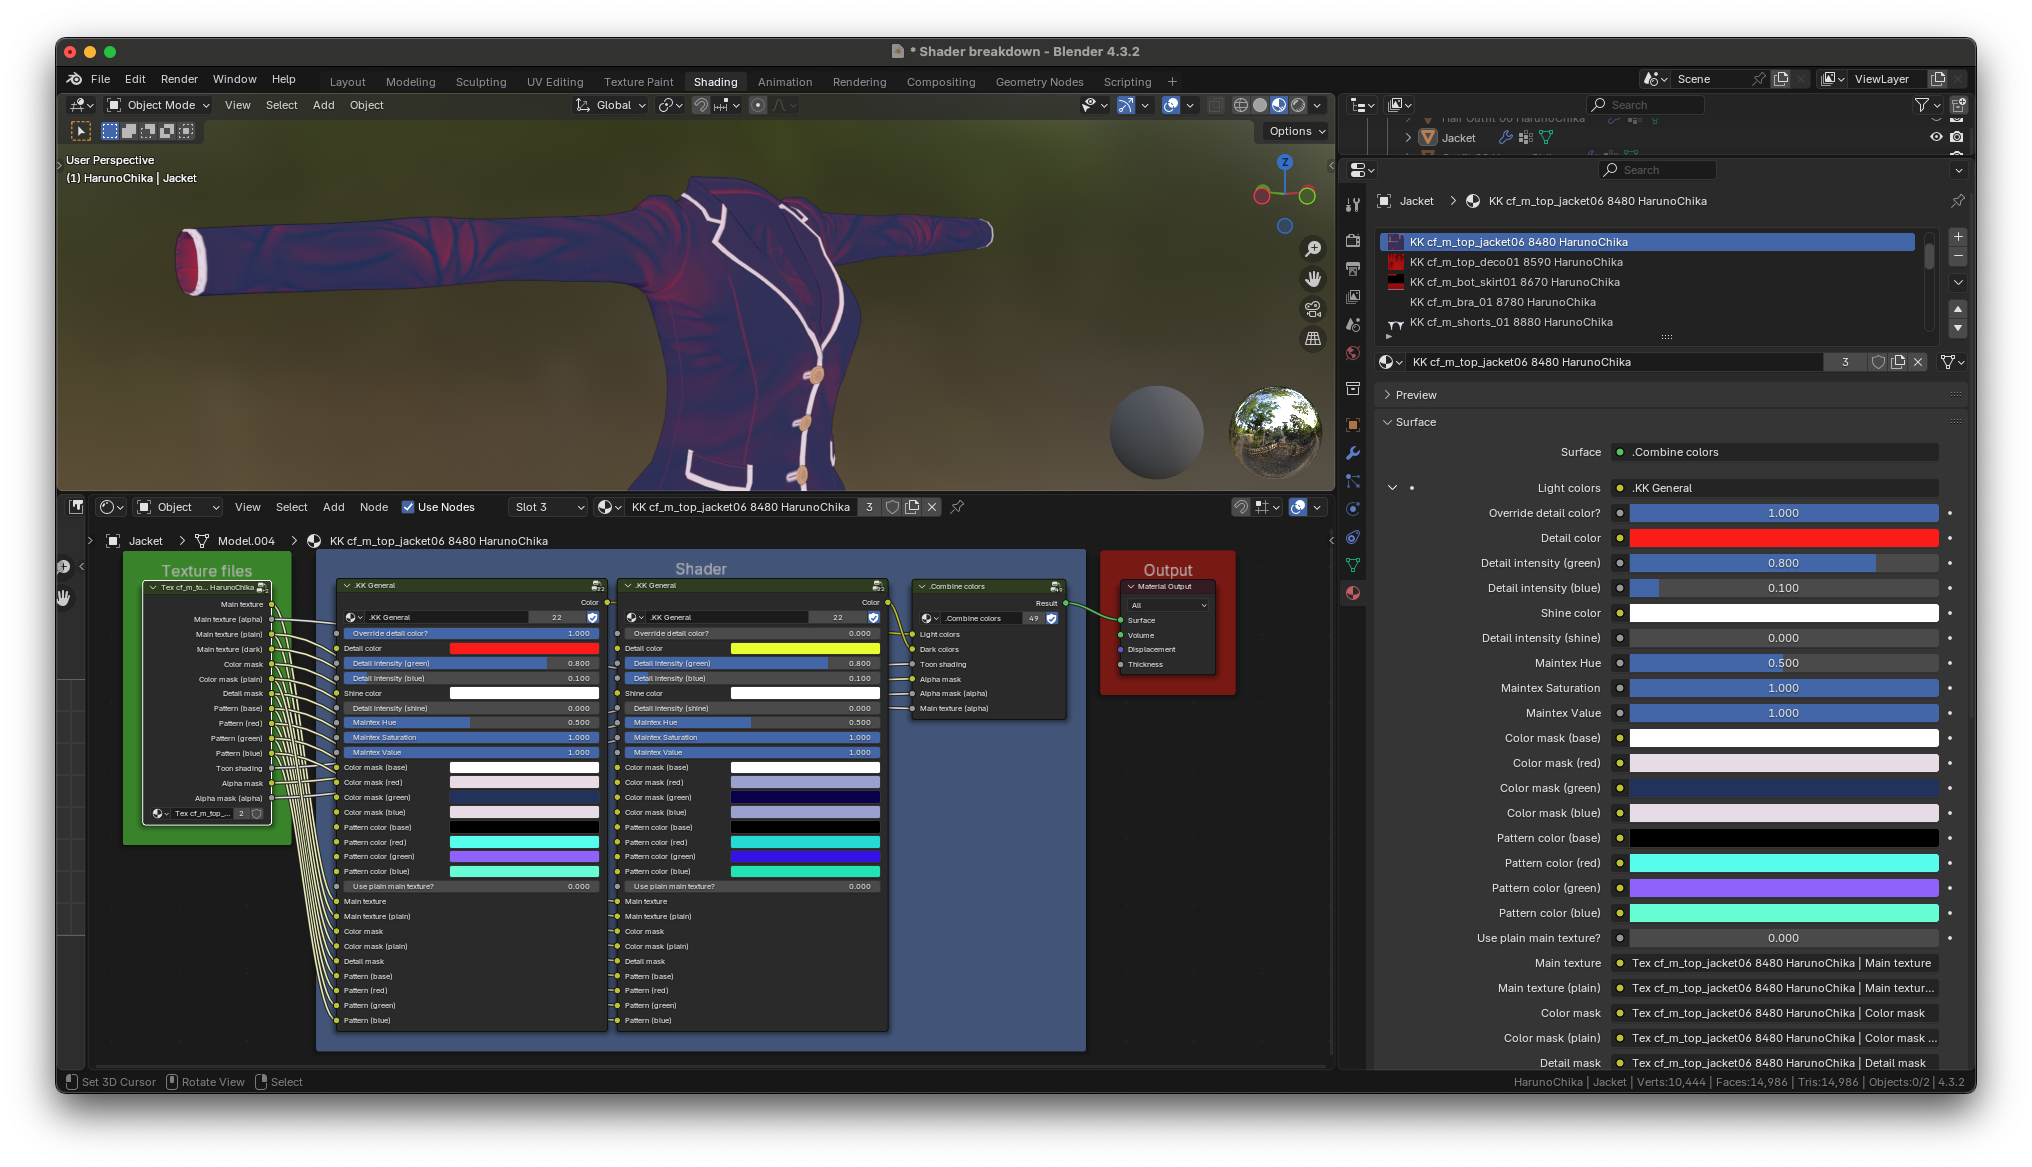
This breakdown will begin by using the clothing found on Chika, the default Koikatsu model. Let’s start by opening up the shading tab in blender.
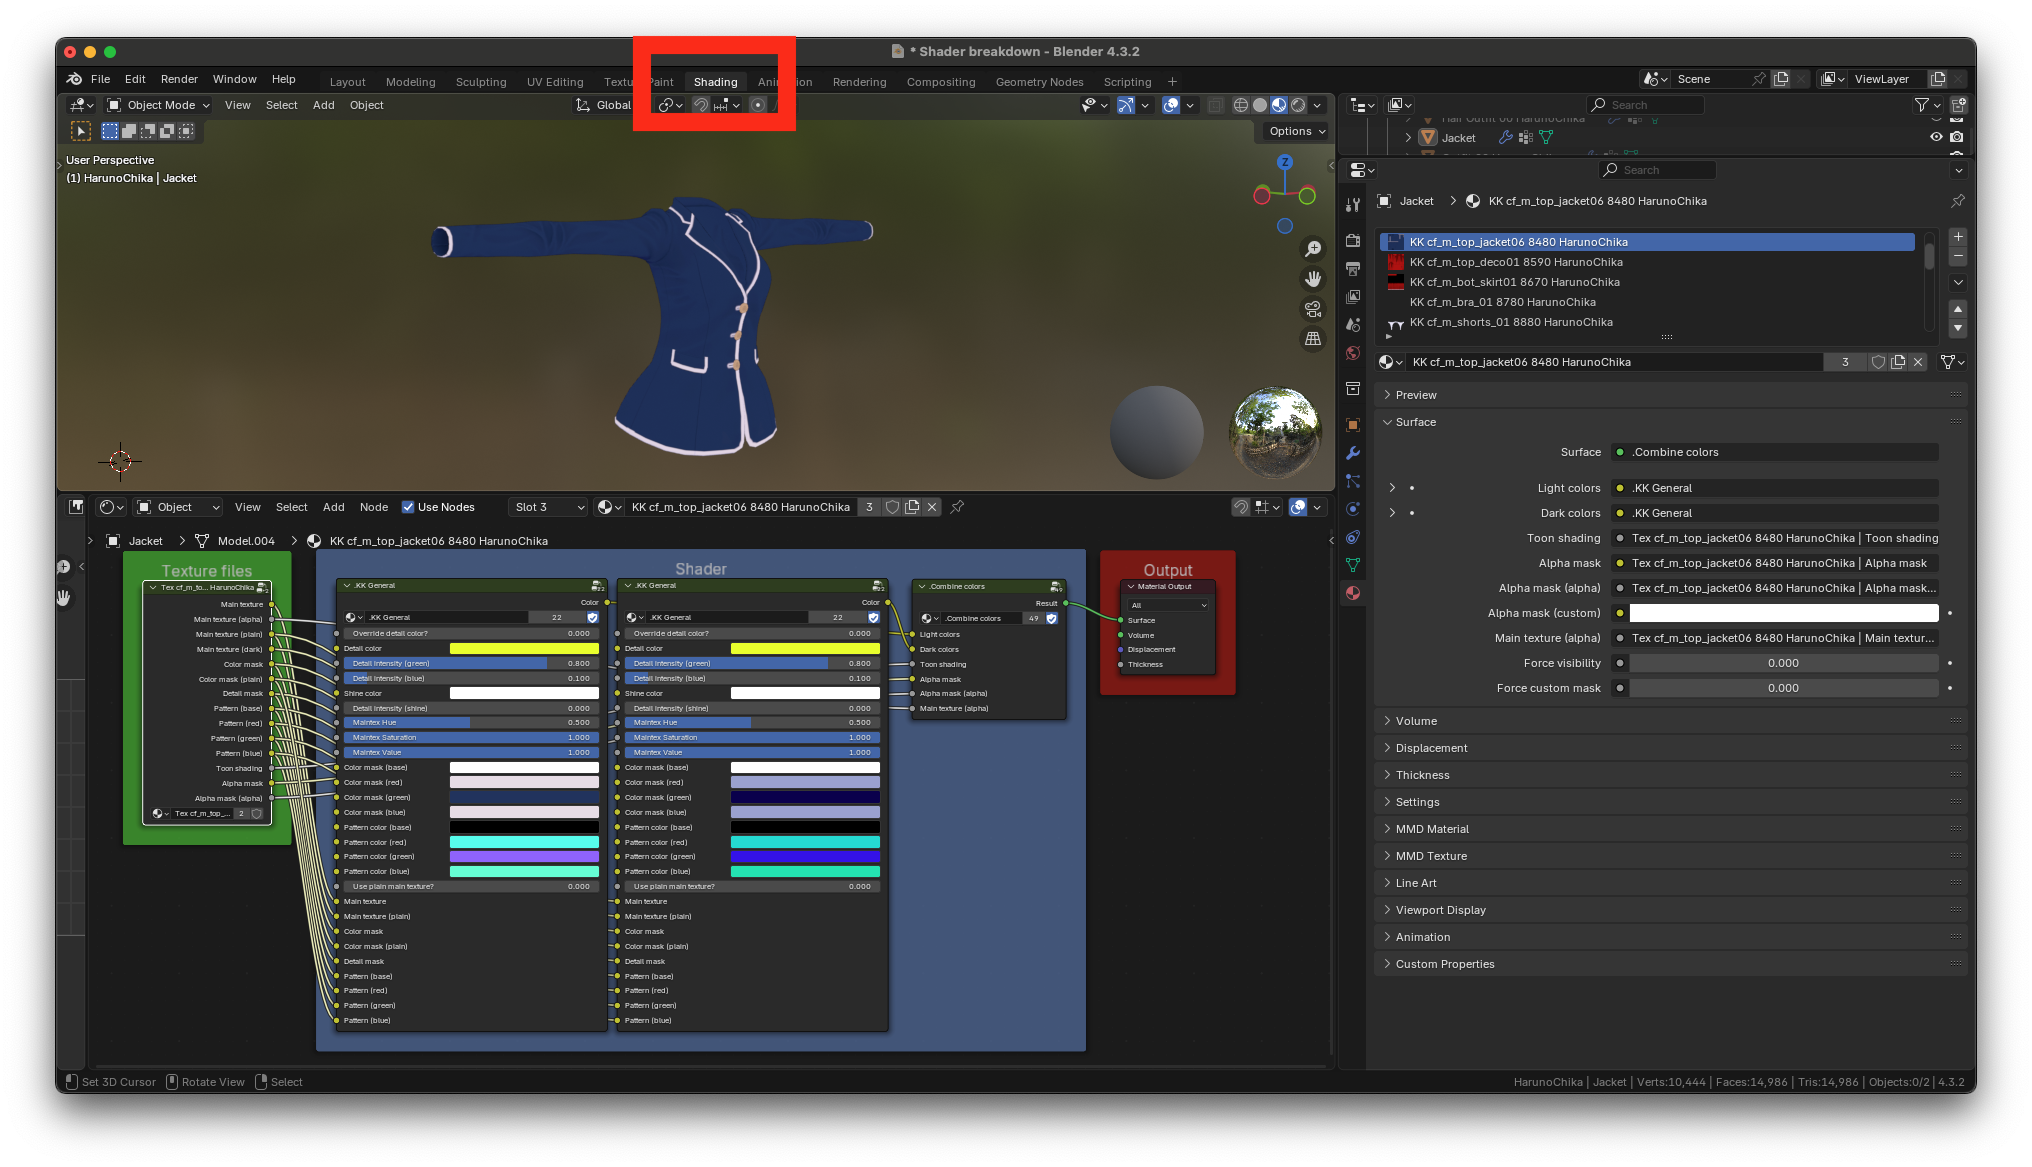
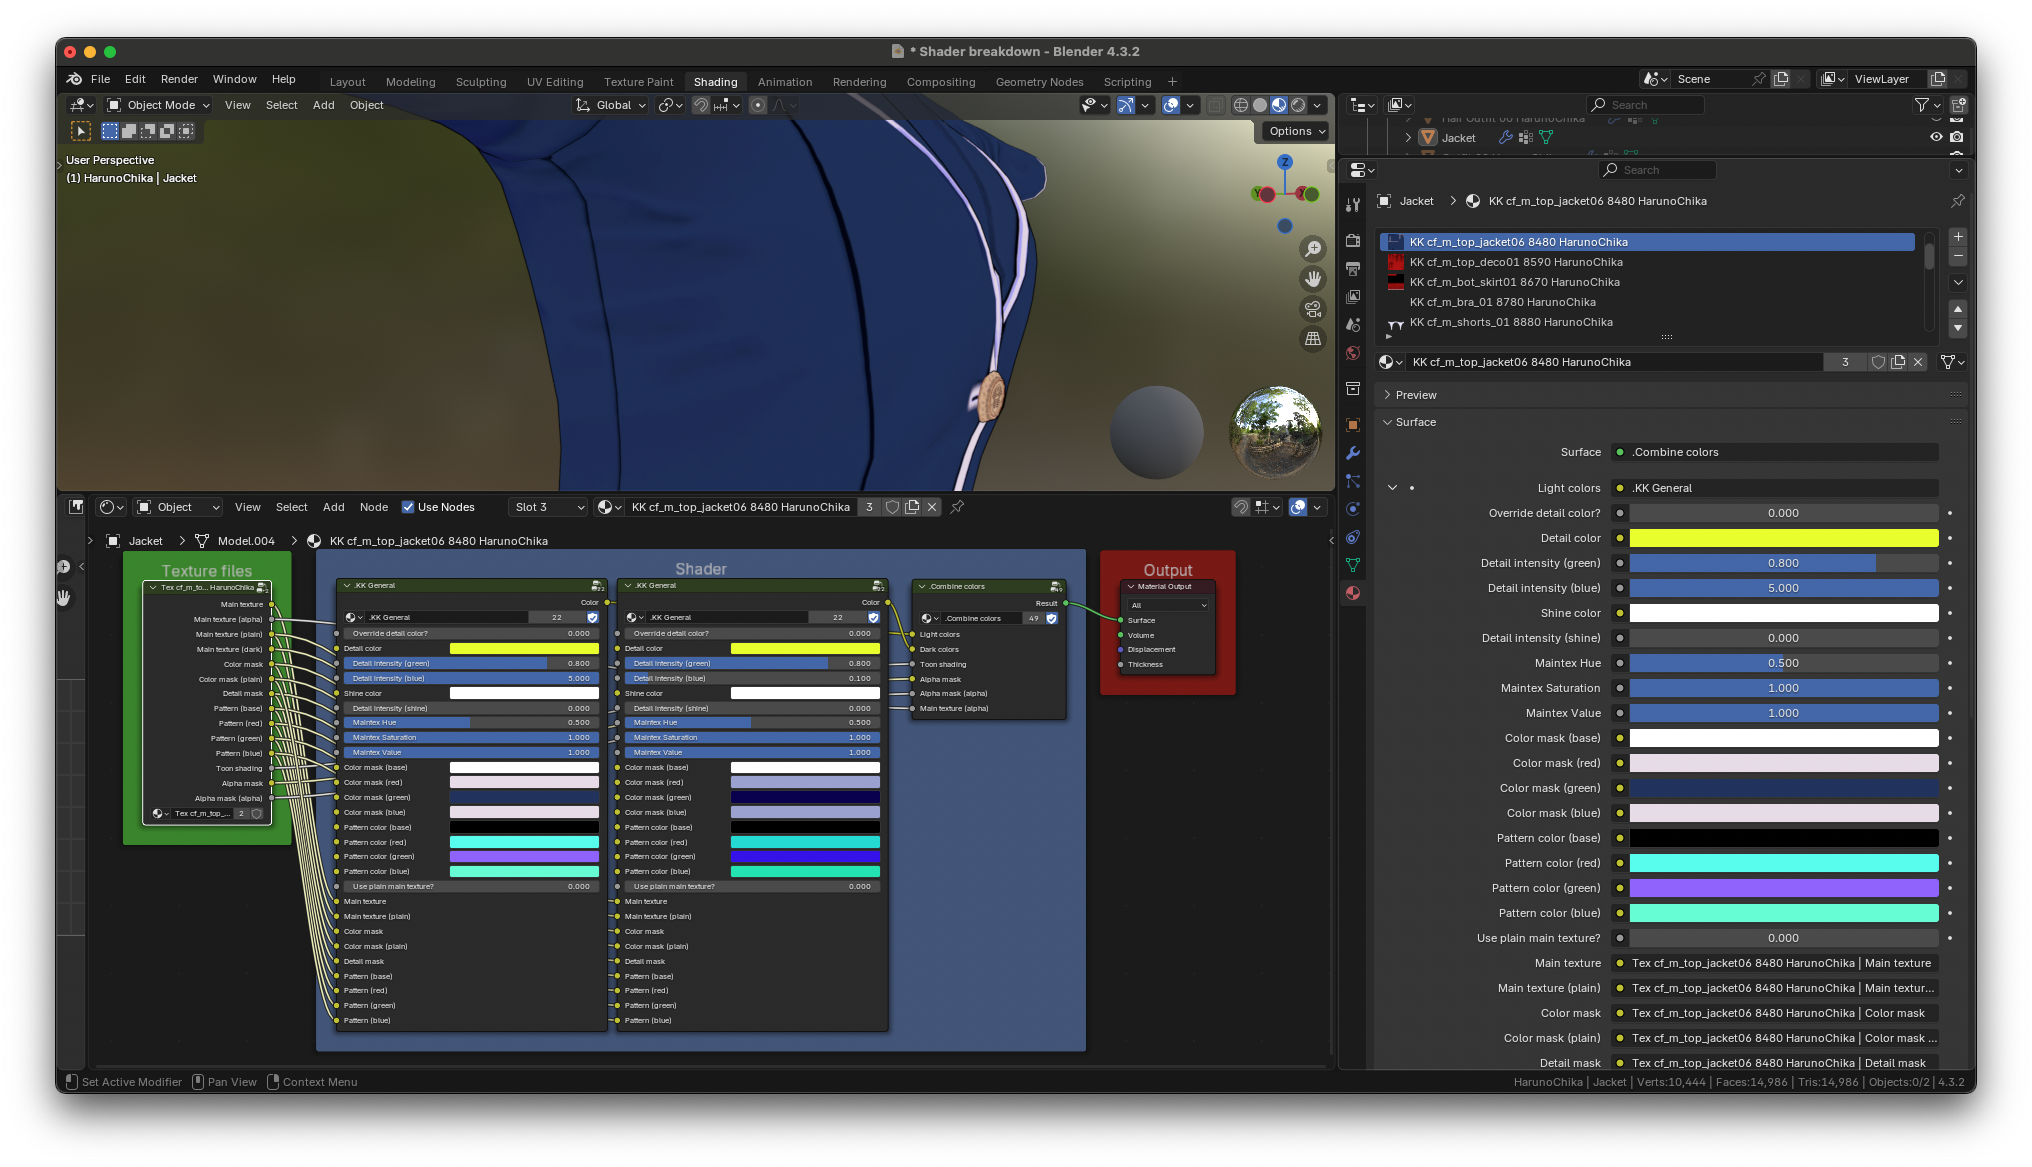
This is the material setup that is used in every material. The texture files from the export folder are loaded into the green group on the left. The colors are generated in the blue group in the middle and then fed to the output node in the red group.
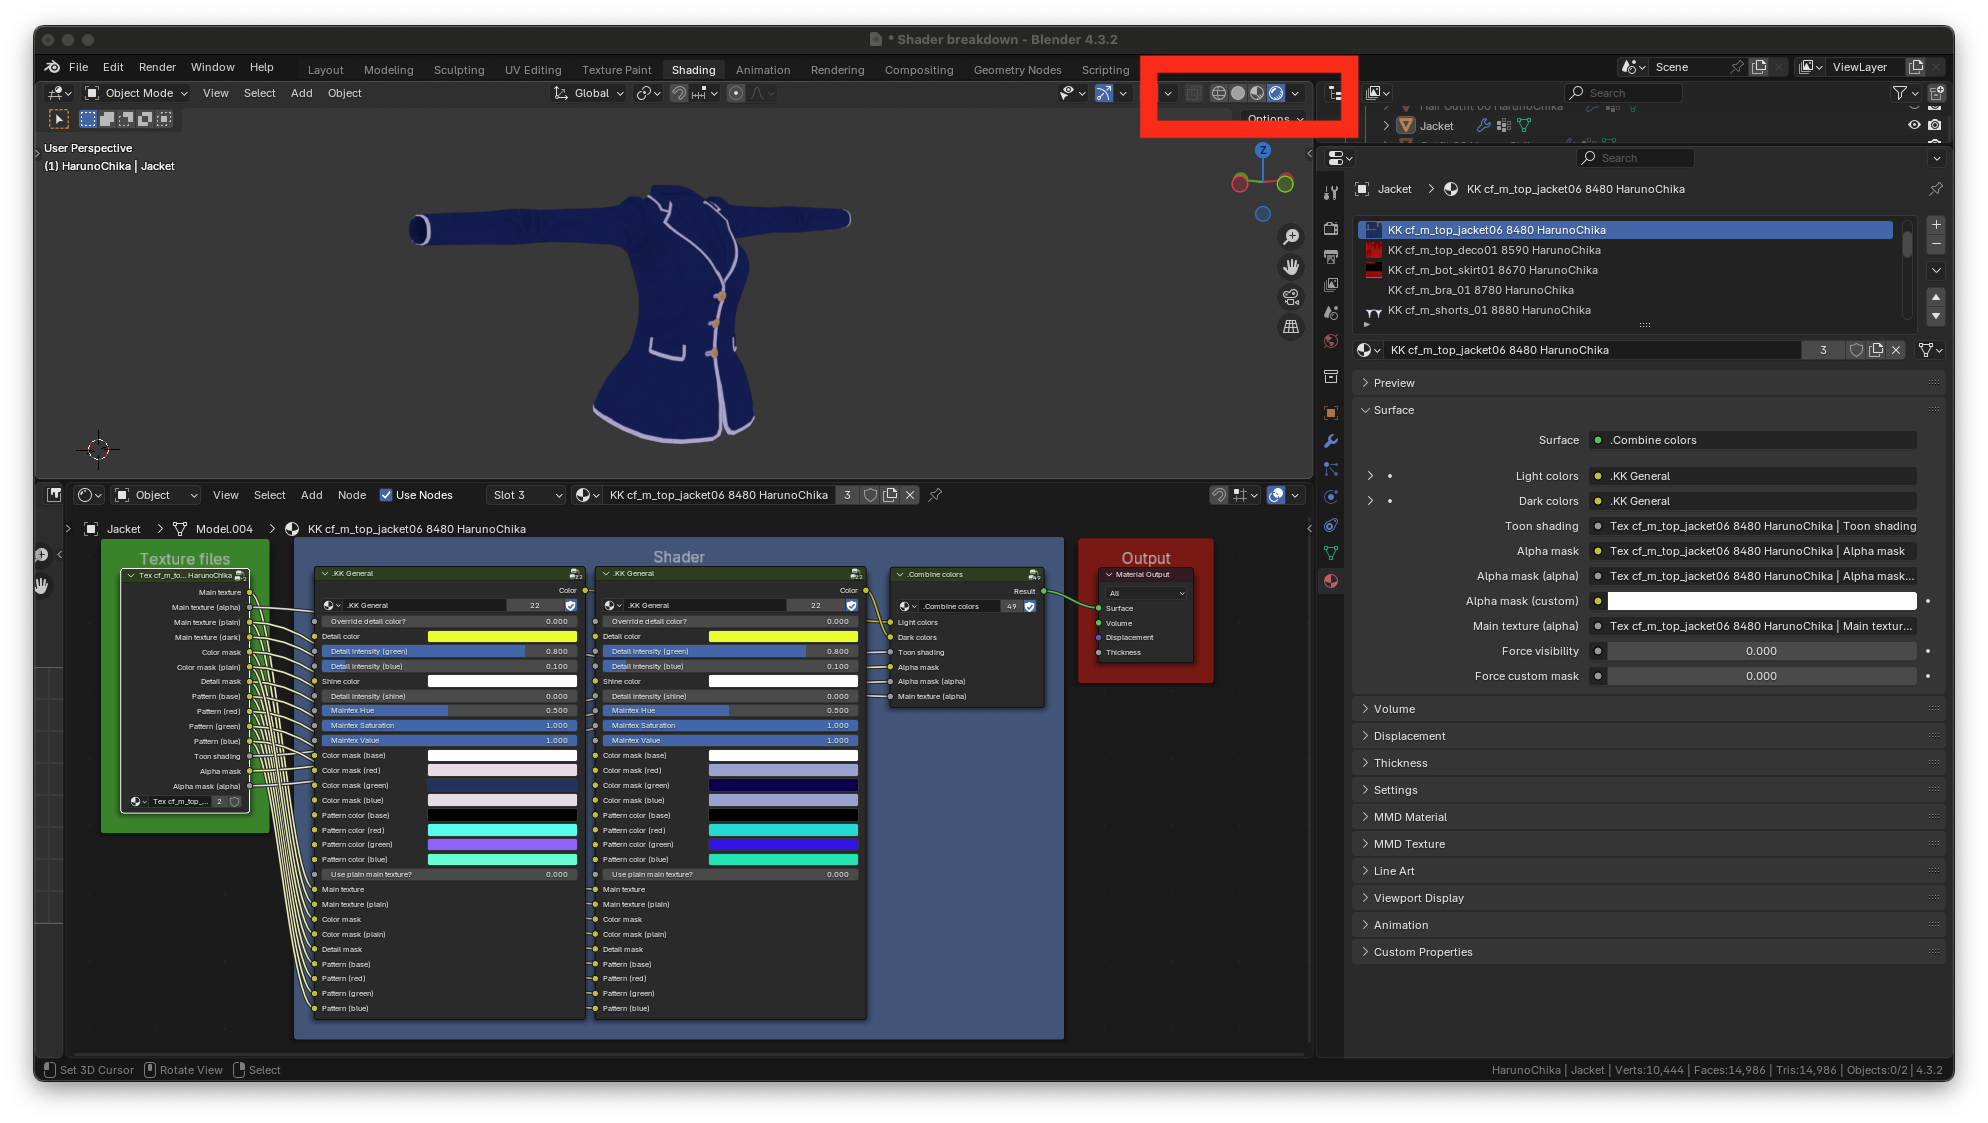
There are light colors and dark colors for every material. Right now, the light colors are showing. You can toggle between the light and dark colors by using the viewport shading buttons on the top right. Here’s what the dark colors look like.
The remainder of this documentation will use the light colors only. You can expand the options for the light colors of the model by clicking on the arrow in the material panel
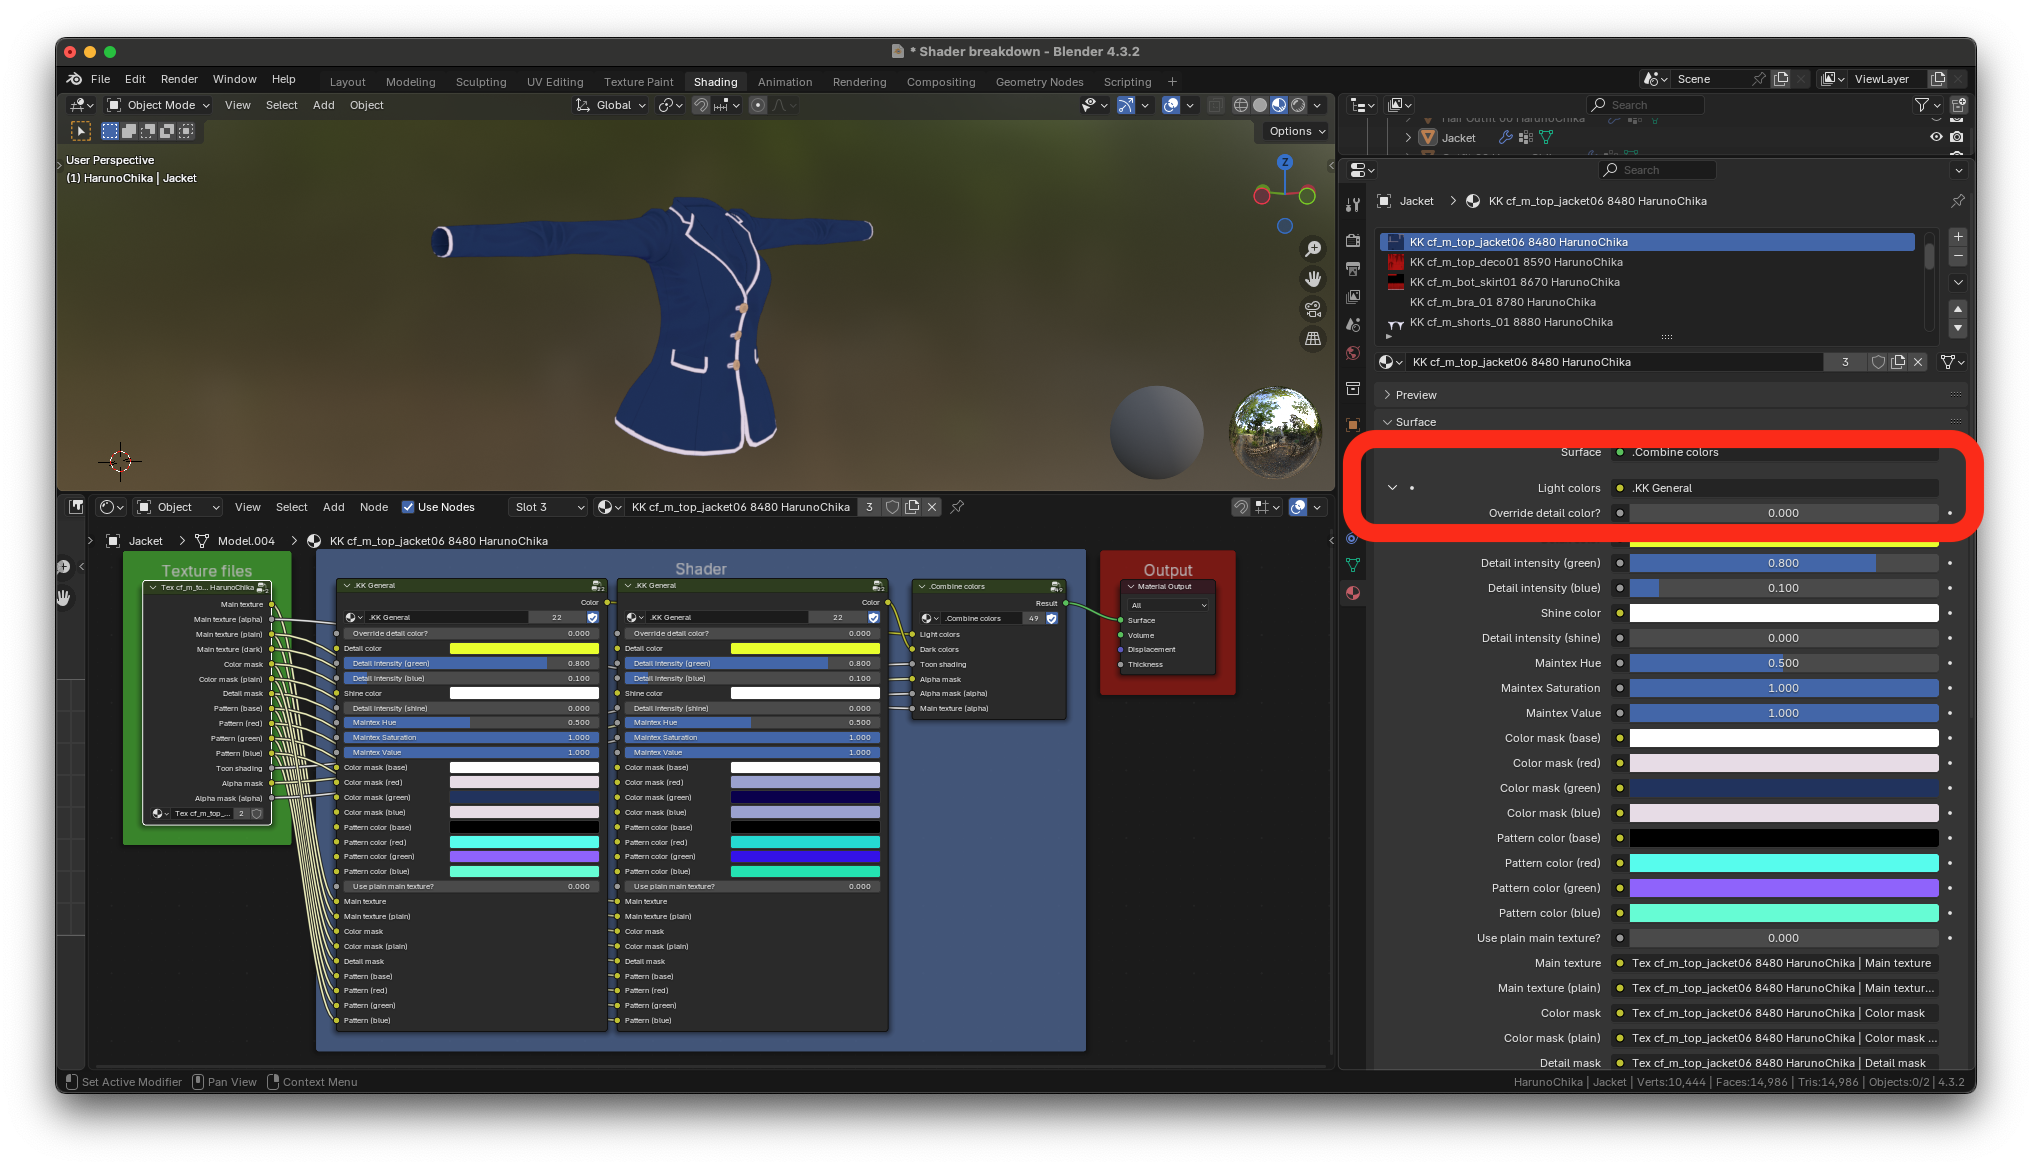
Detail color
Let’s go through each option. The first option is override detail color. KKBP automatically generates a detail color for you but if you want to override the color it gives you, you can enable this slider and set the detail color to whatever you want. Here’s what it looks like when it’s set to yellow
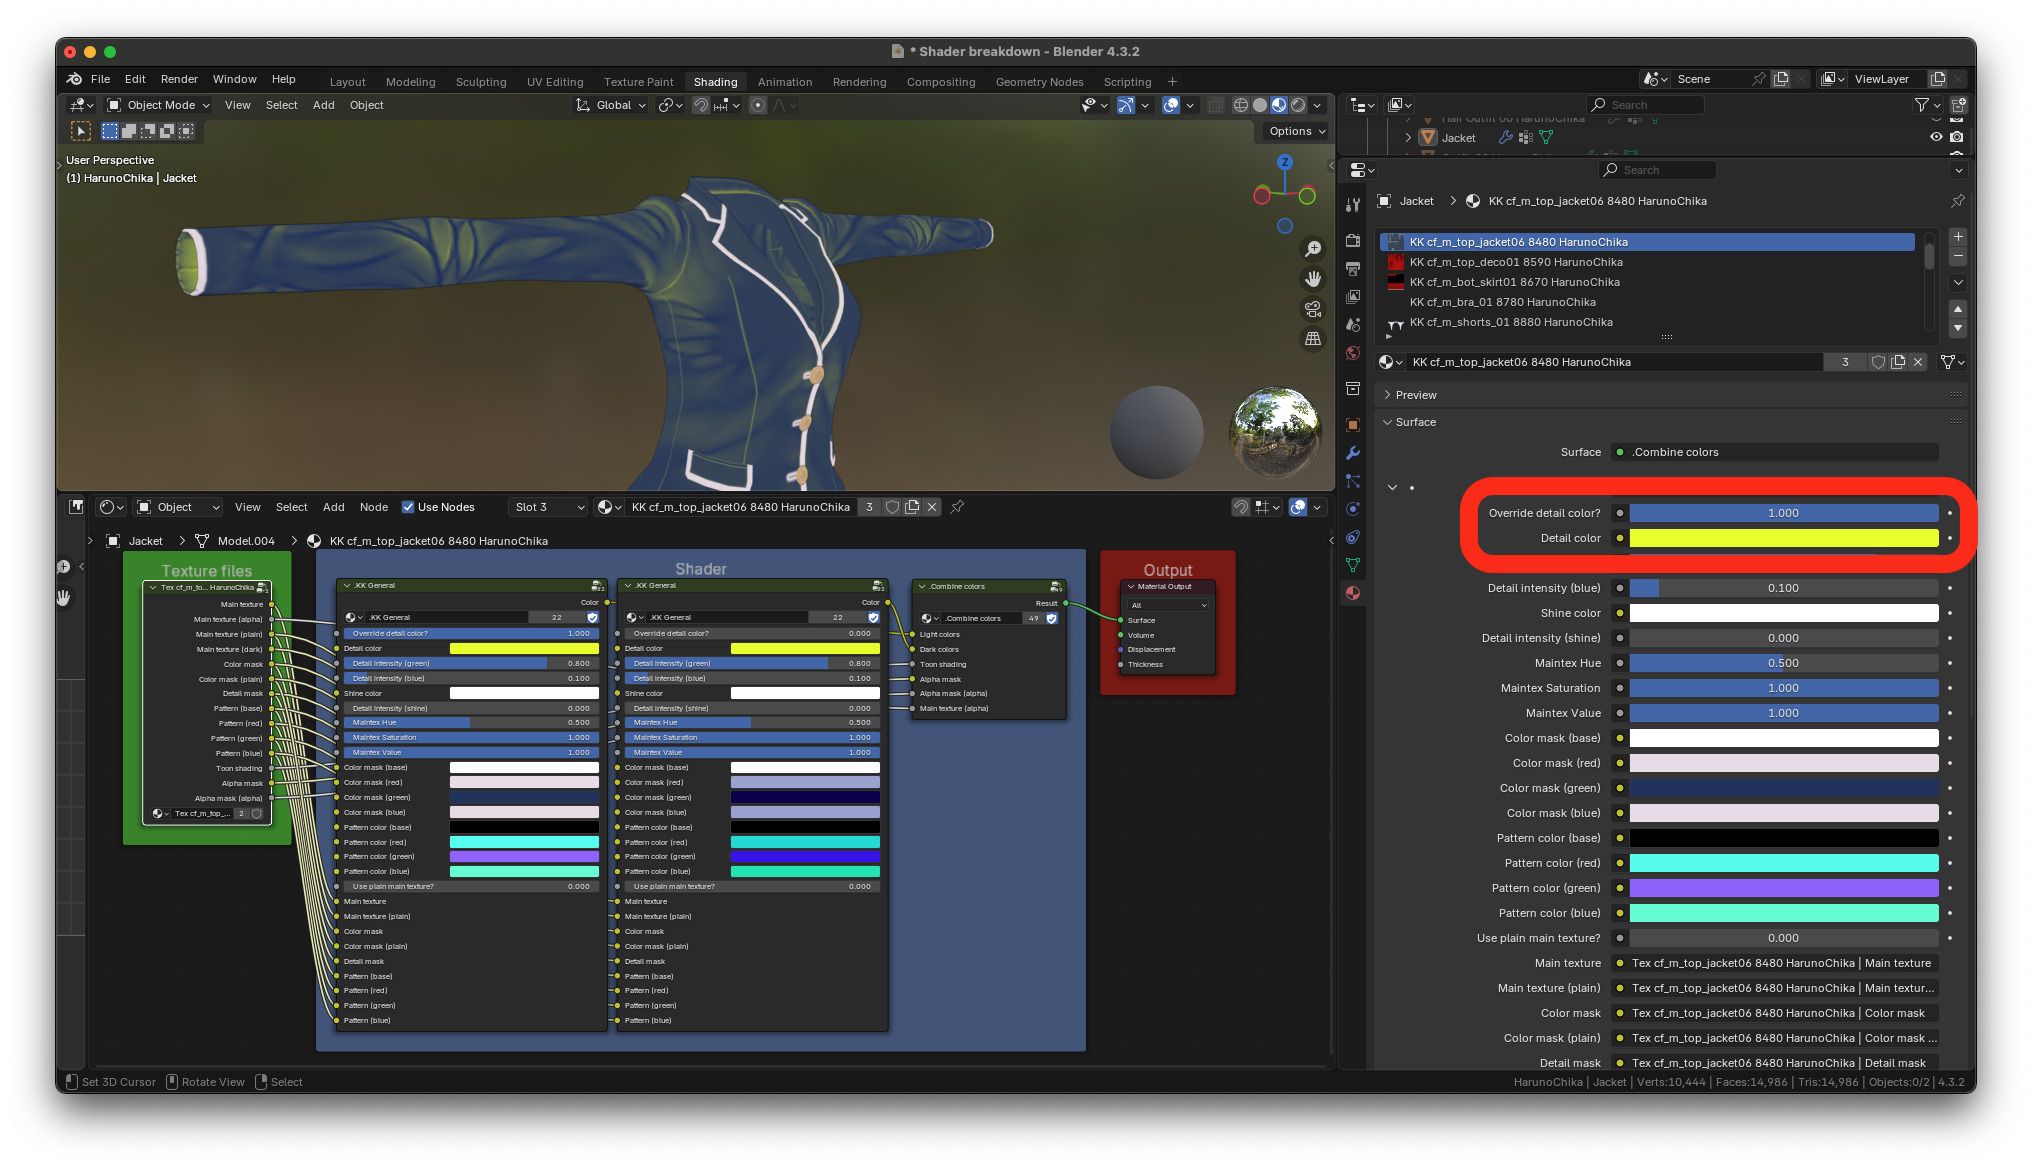
Here’s what it looks like when it’s set to red
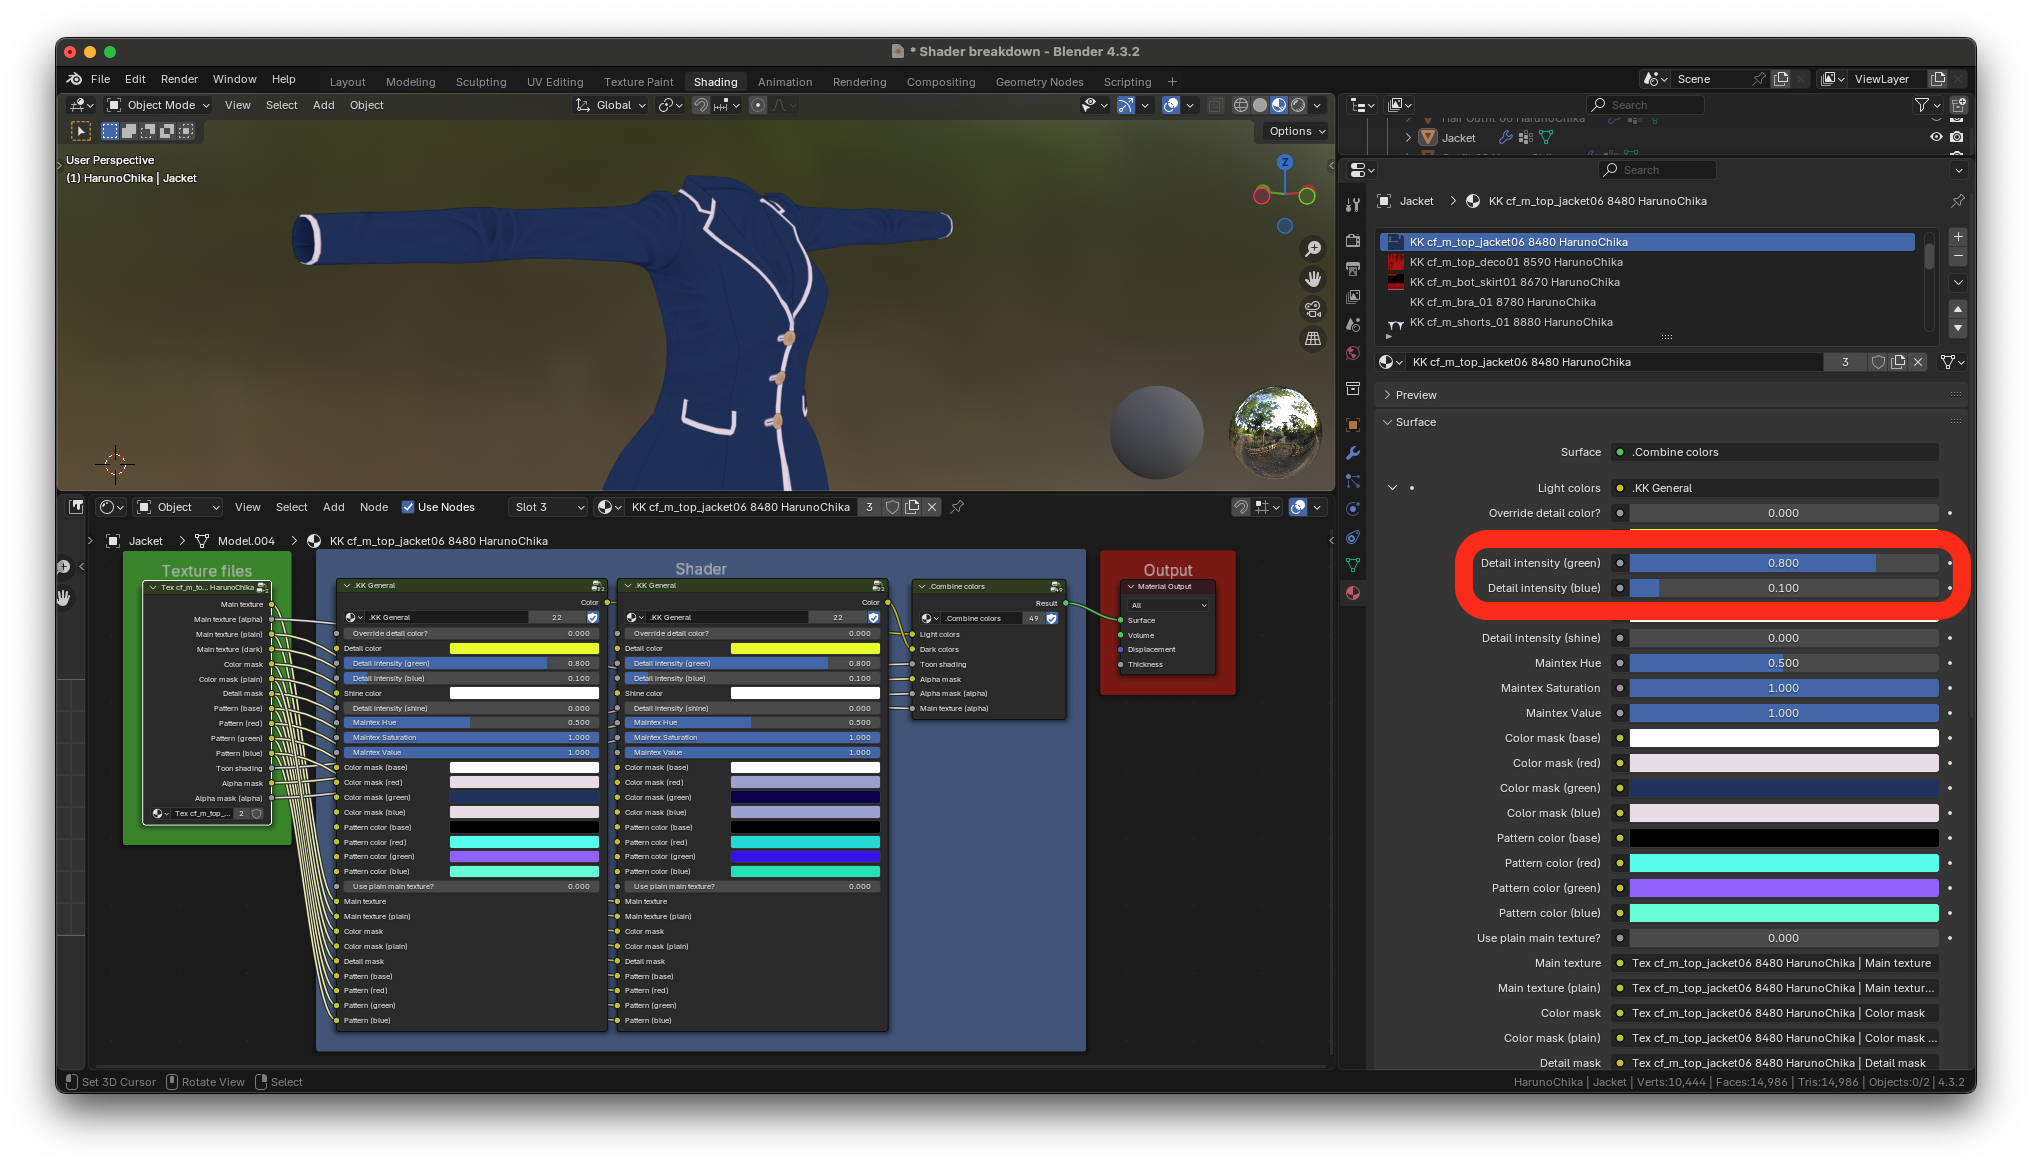
Detail intensity
The next option is green detail intensity. Green detail intensity usually controls the soft details on clothes. Here’s what the jacket look like at the default of .8 intensity
Here’s what the jacket look like when it’s set to five green intensity

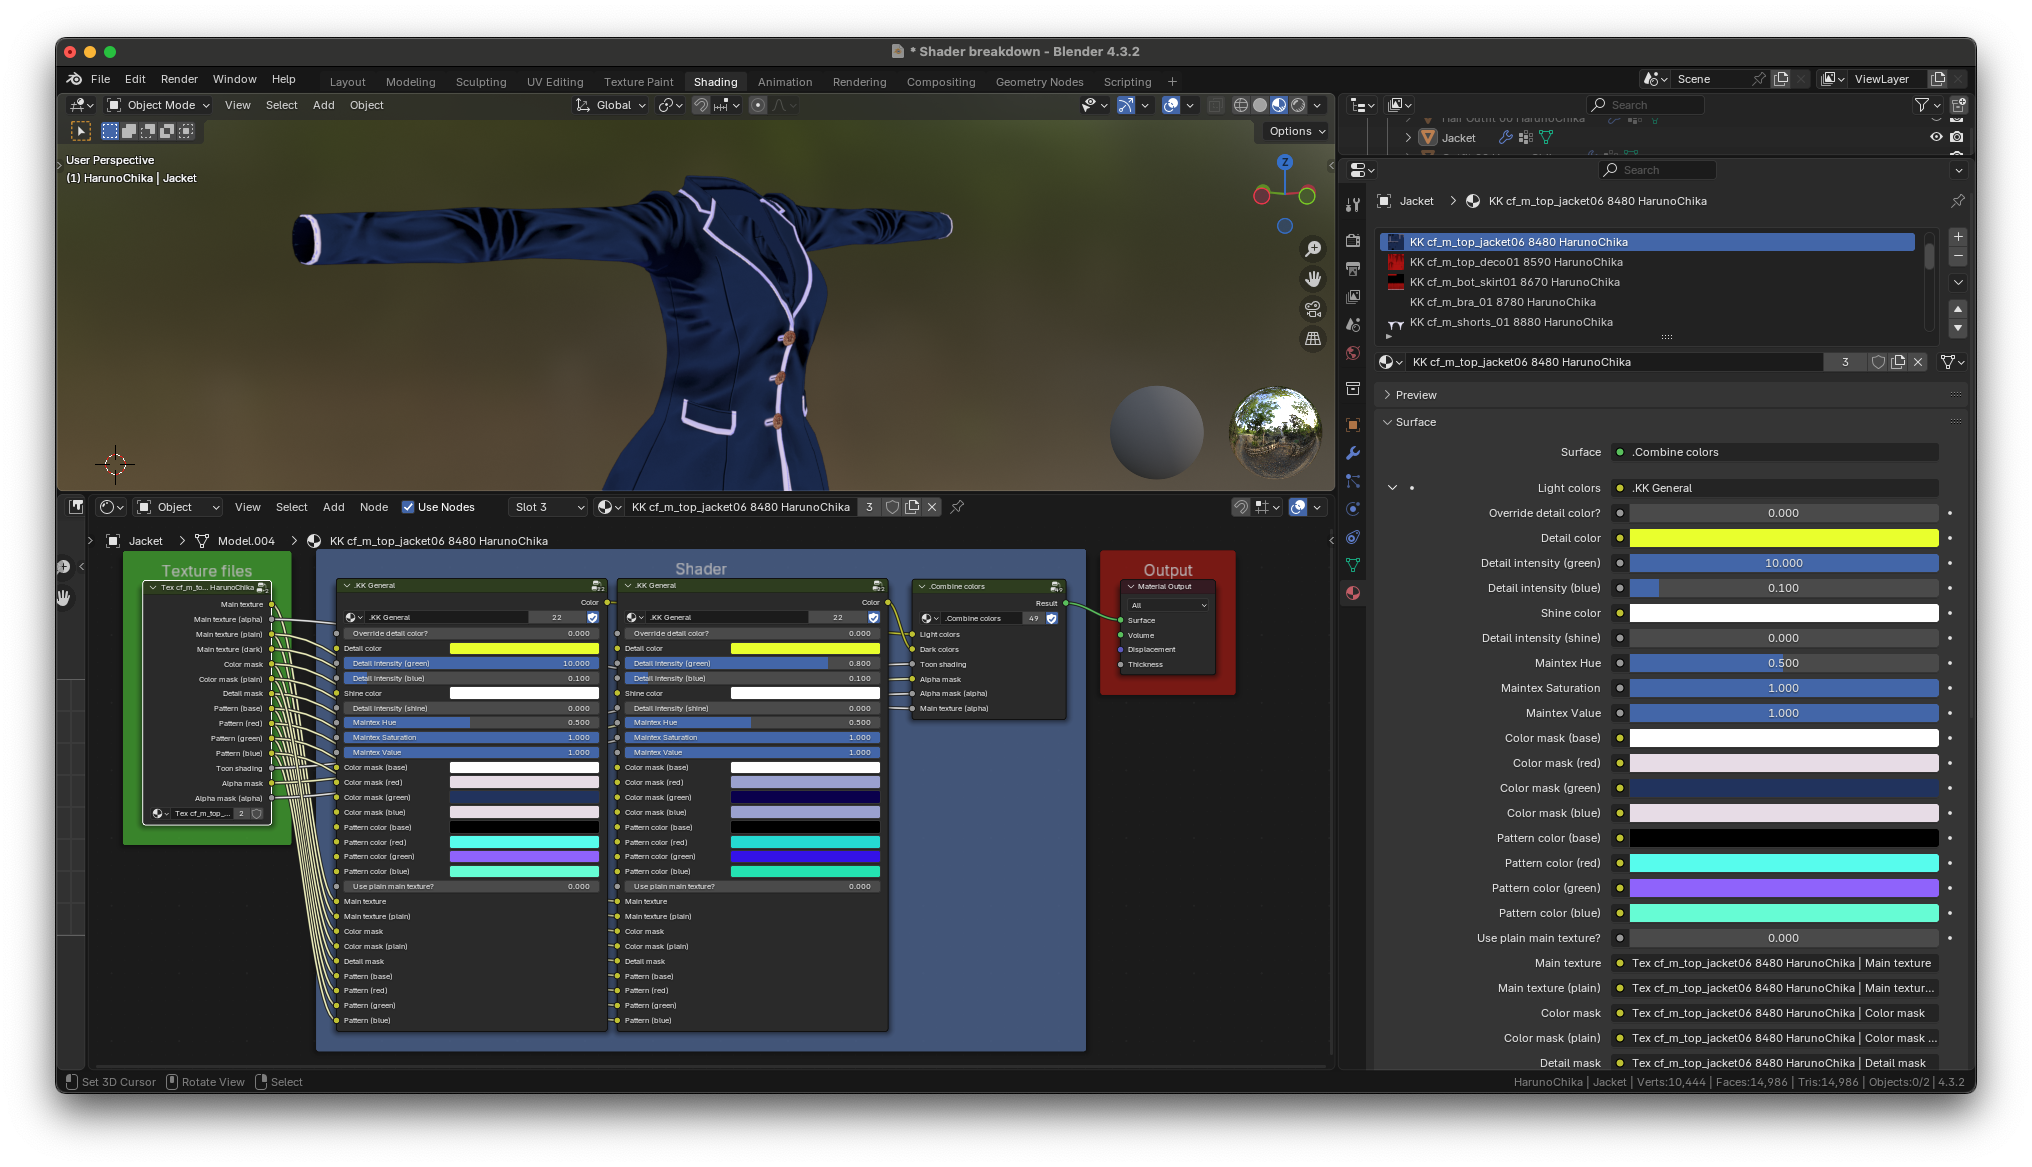
And here’s what they look like when the detail is set to 10 green intensity
The blue detail intensity usually controls hardline details on clothes. Here’s what the jacket look like it’s set to the default of 0.1.
Here’s what it look like when it’s set to one

And here’s what it look like when it’s set to five
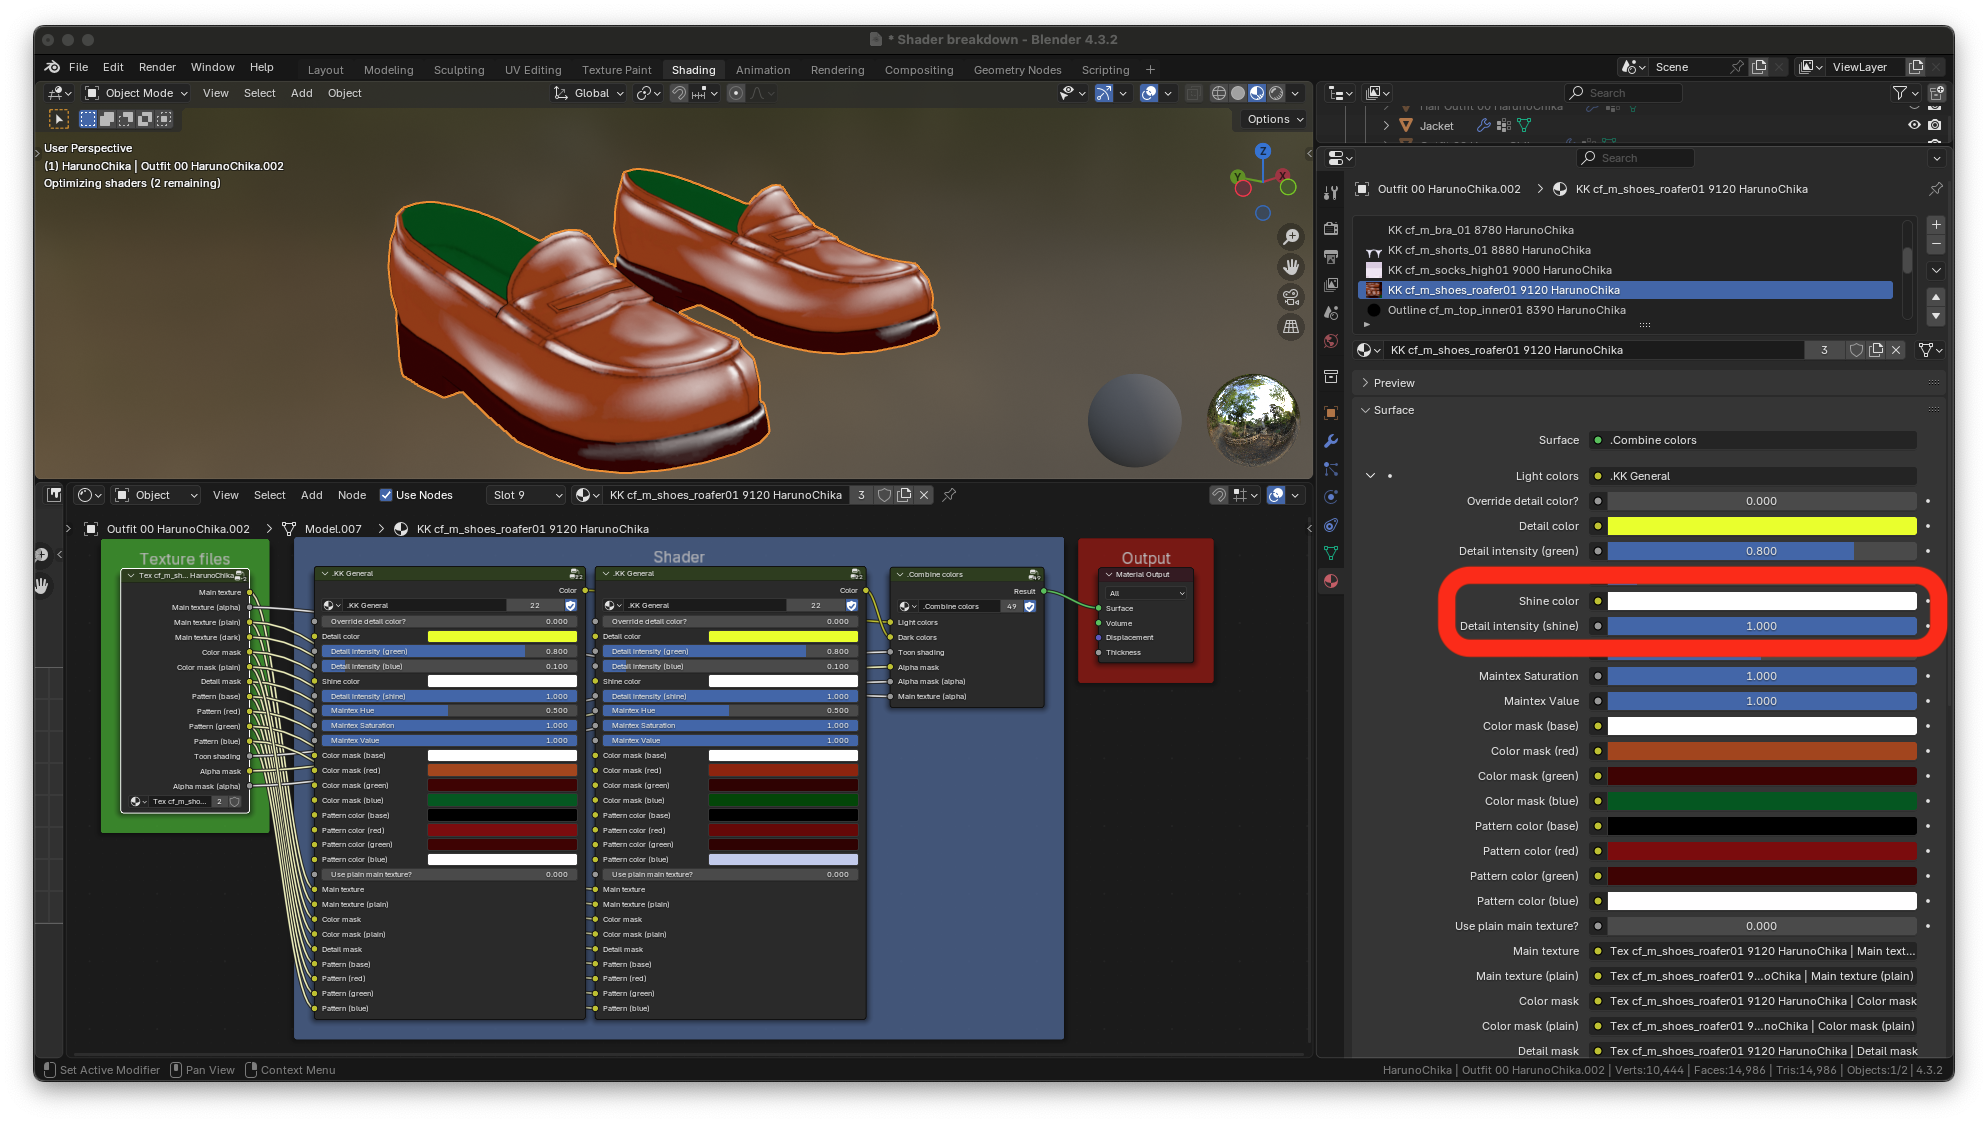
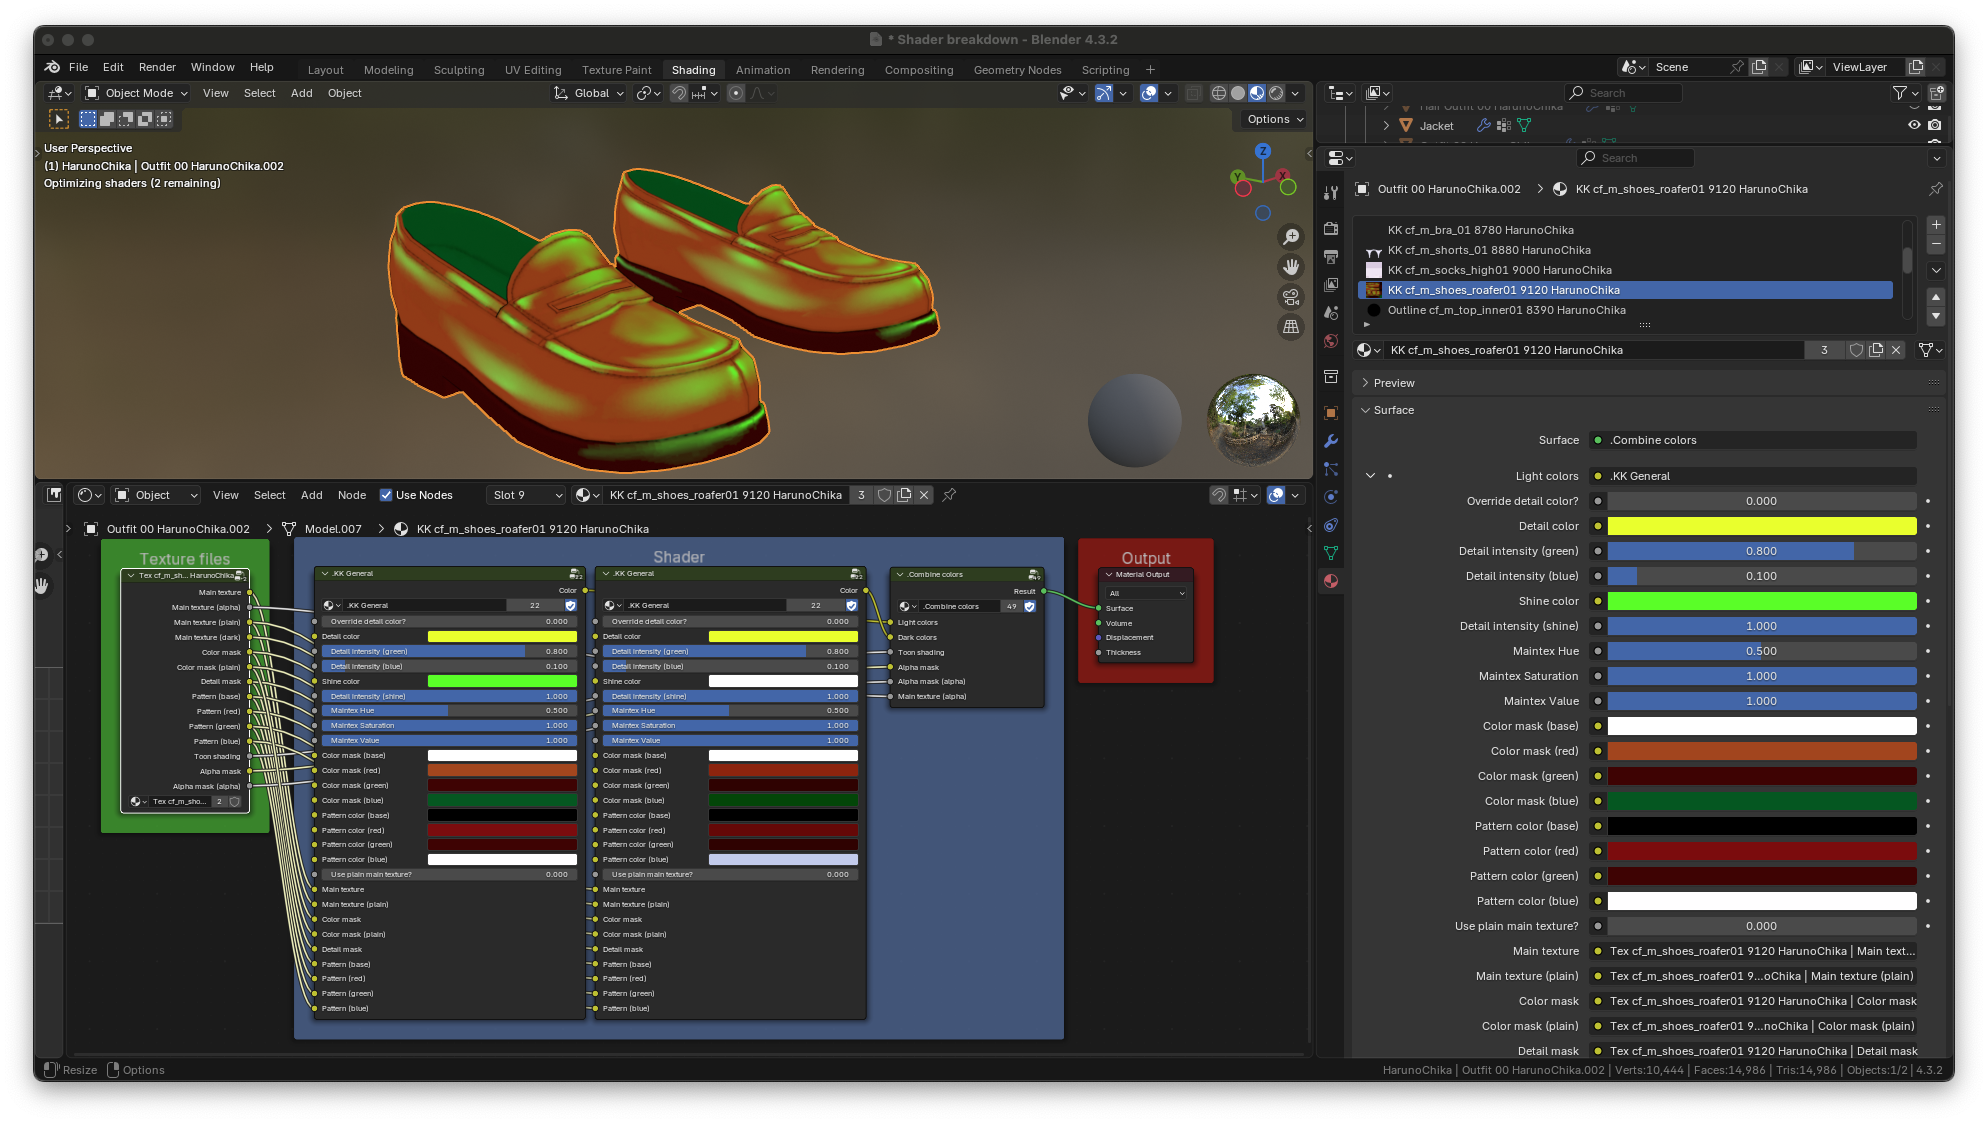
Shine
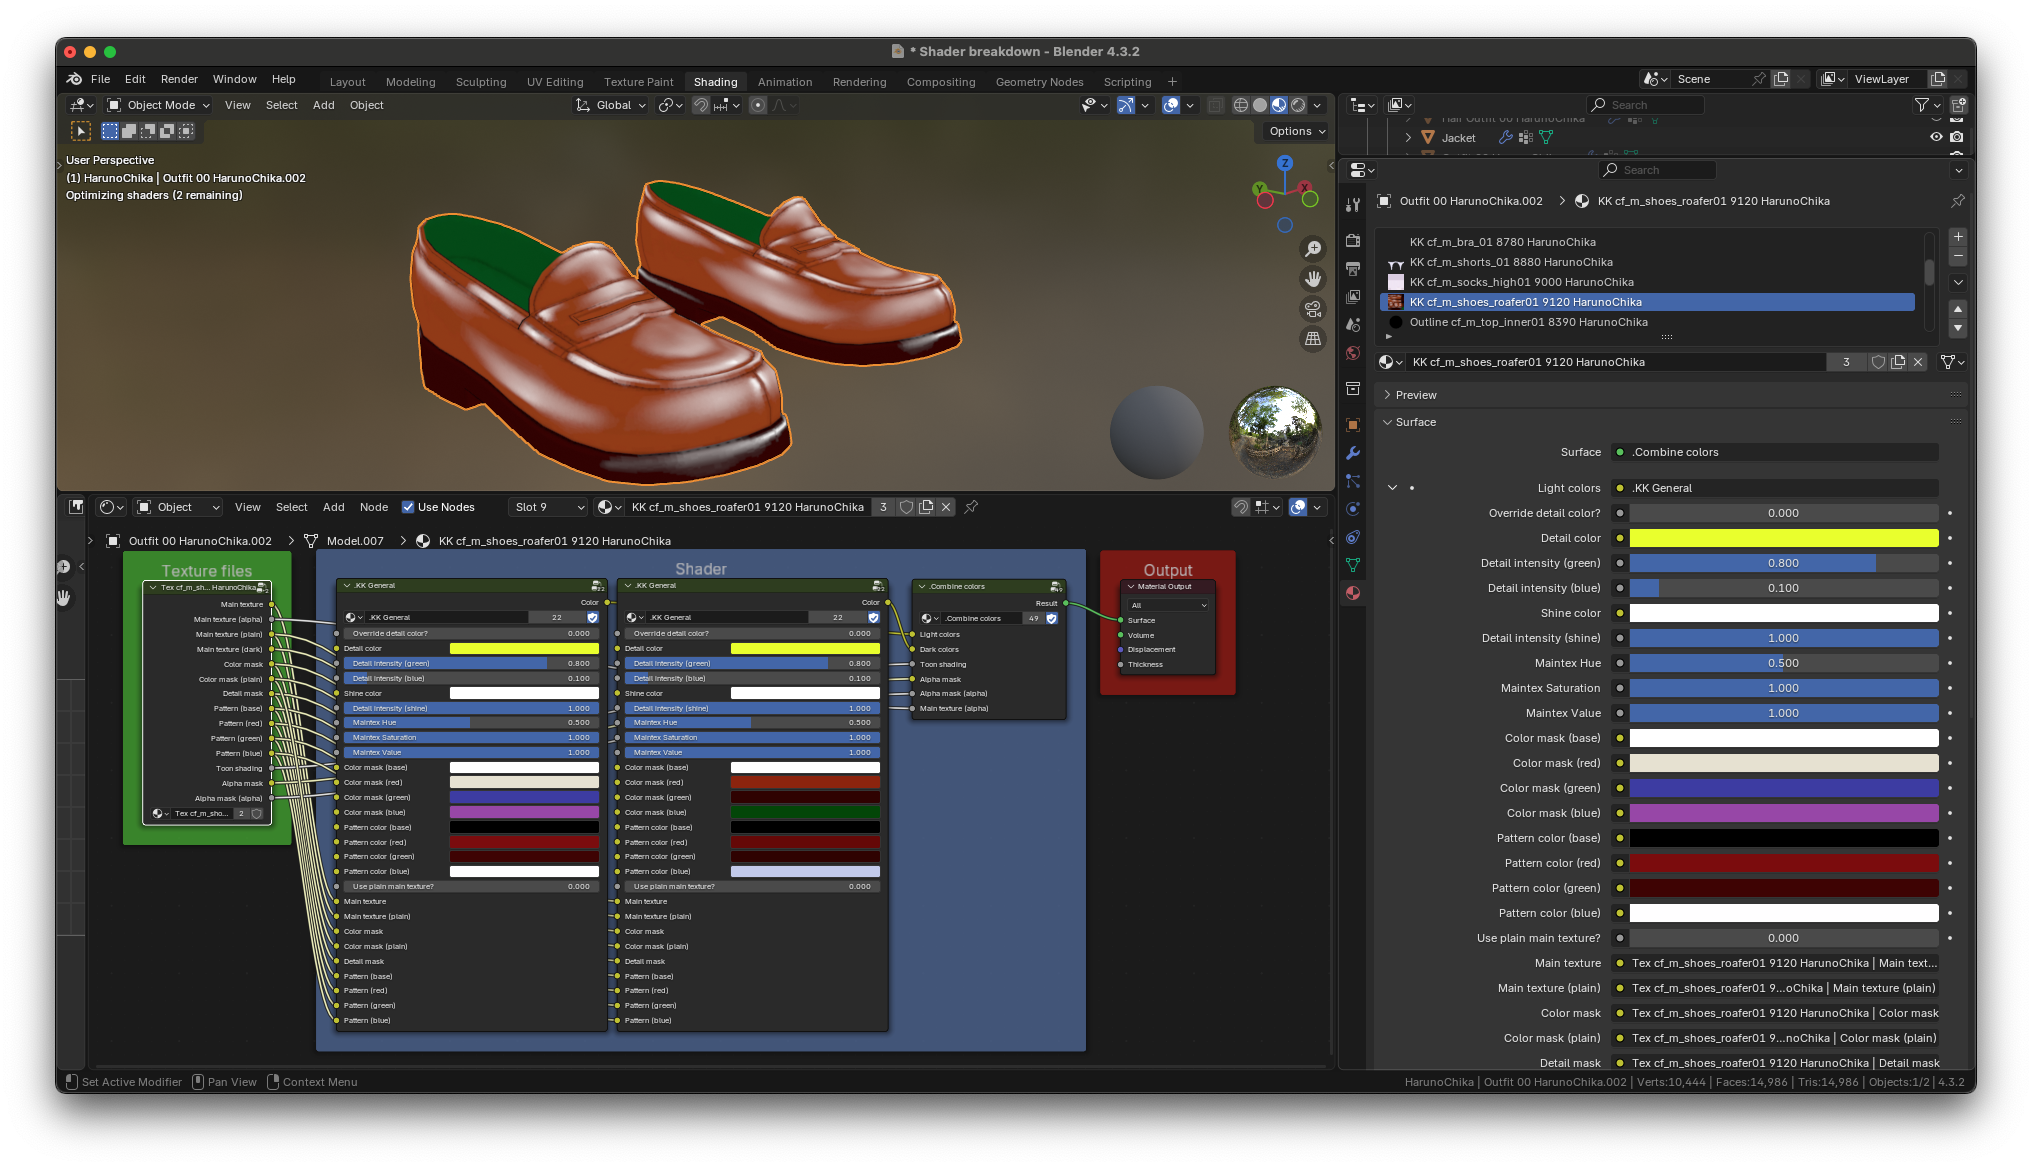
Some clothes also have a shininess that can be adjusted. The default loafers have an adjustable shine. The color of the shine can be changed. Here’s what the loafers look like with a white shine.
And here’s what they look like with a green shine
The intensity of the shine can also be adjusted. Here’s what the loafers look like with the default shine intensity of one.
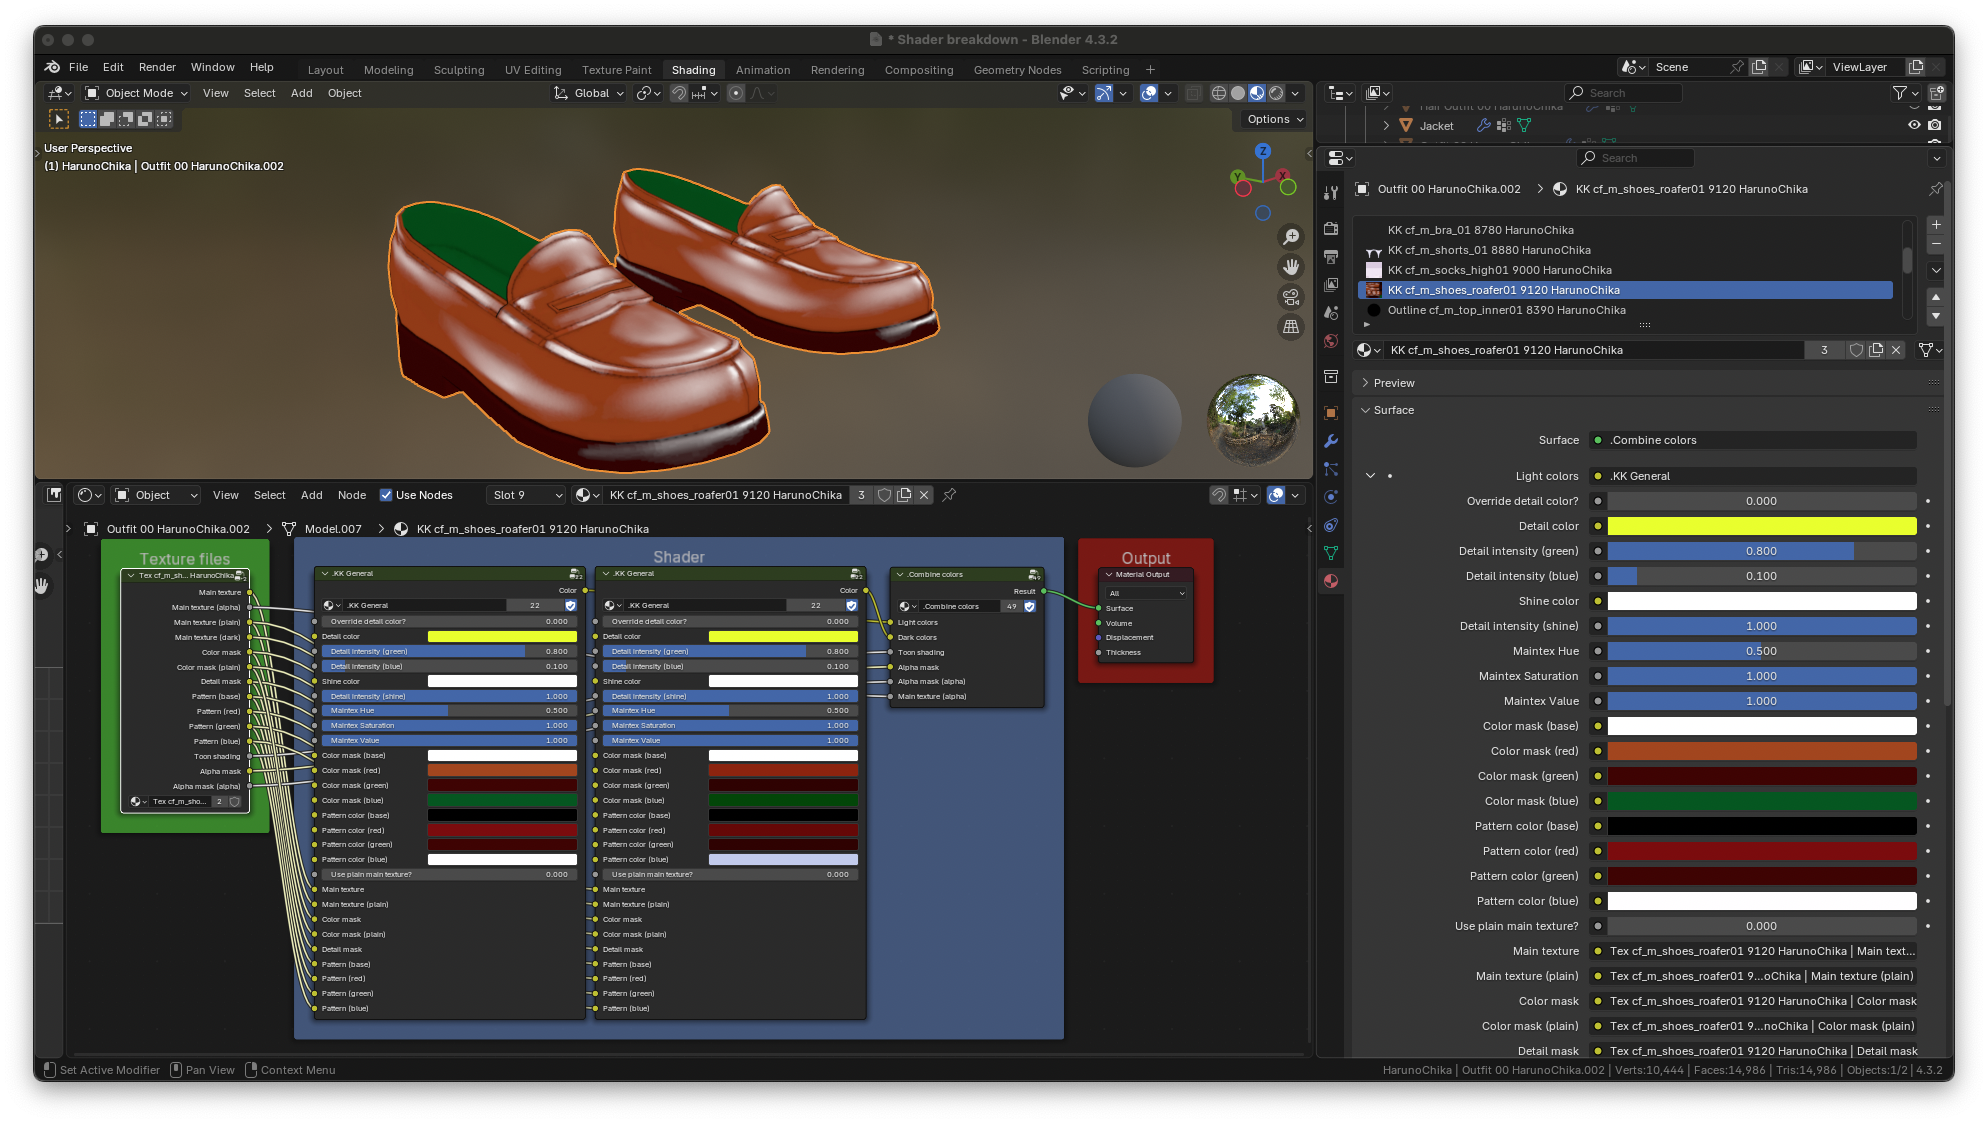
Here’s what the loafers look like with the shine intensity set to zero
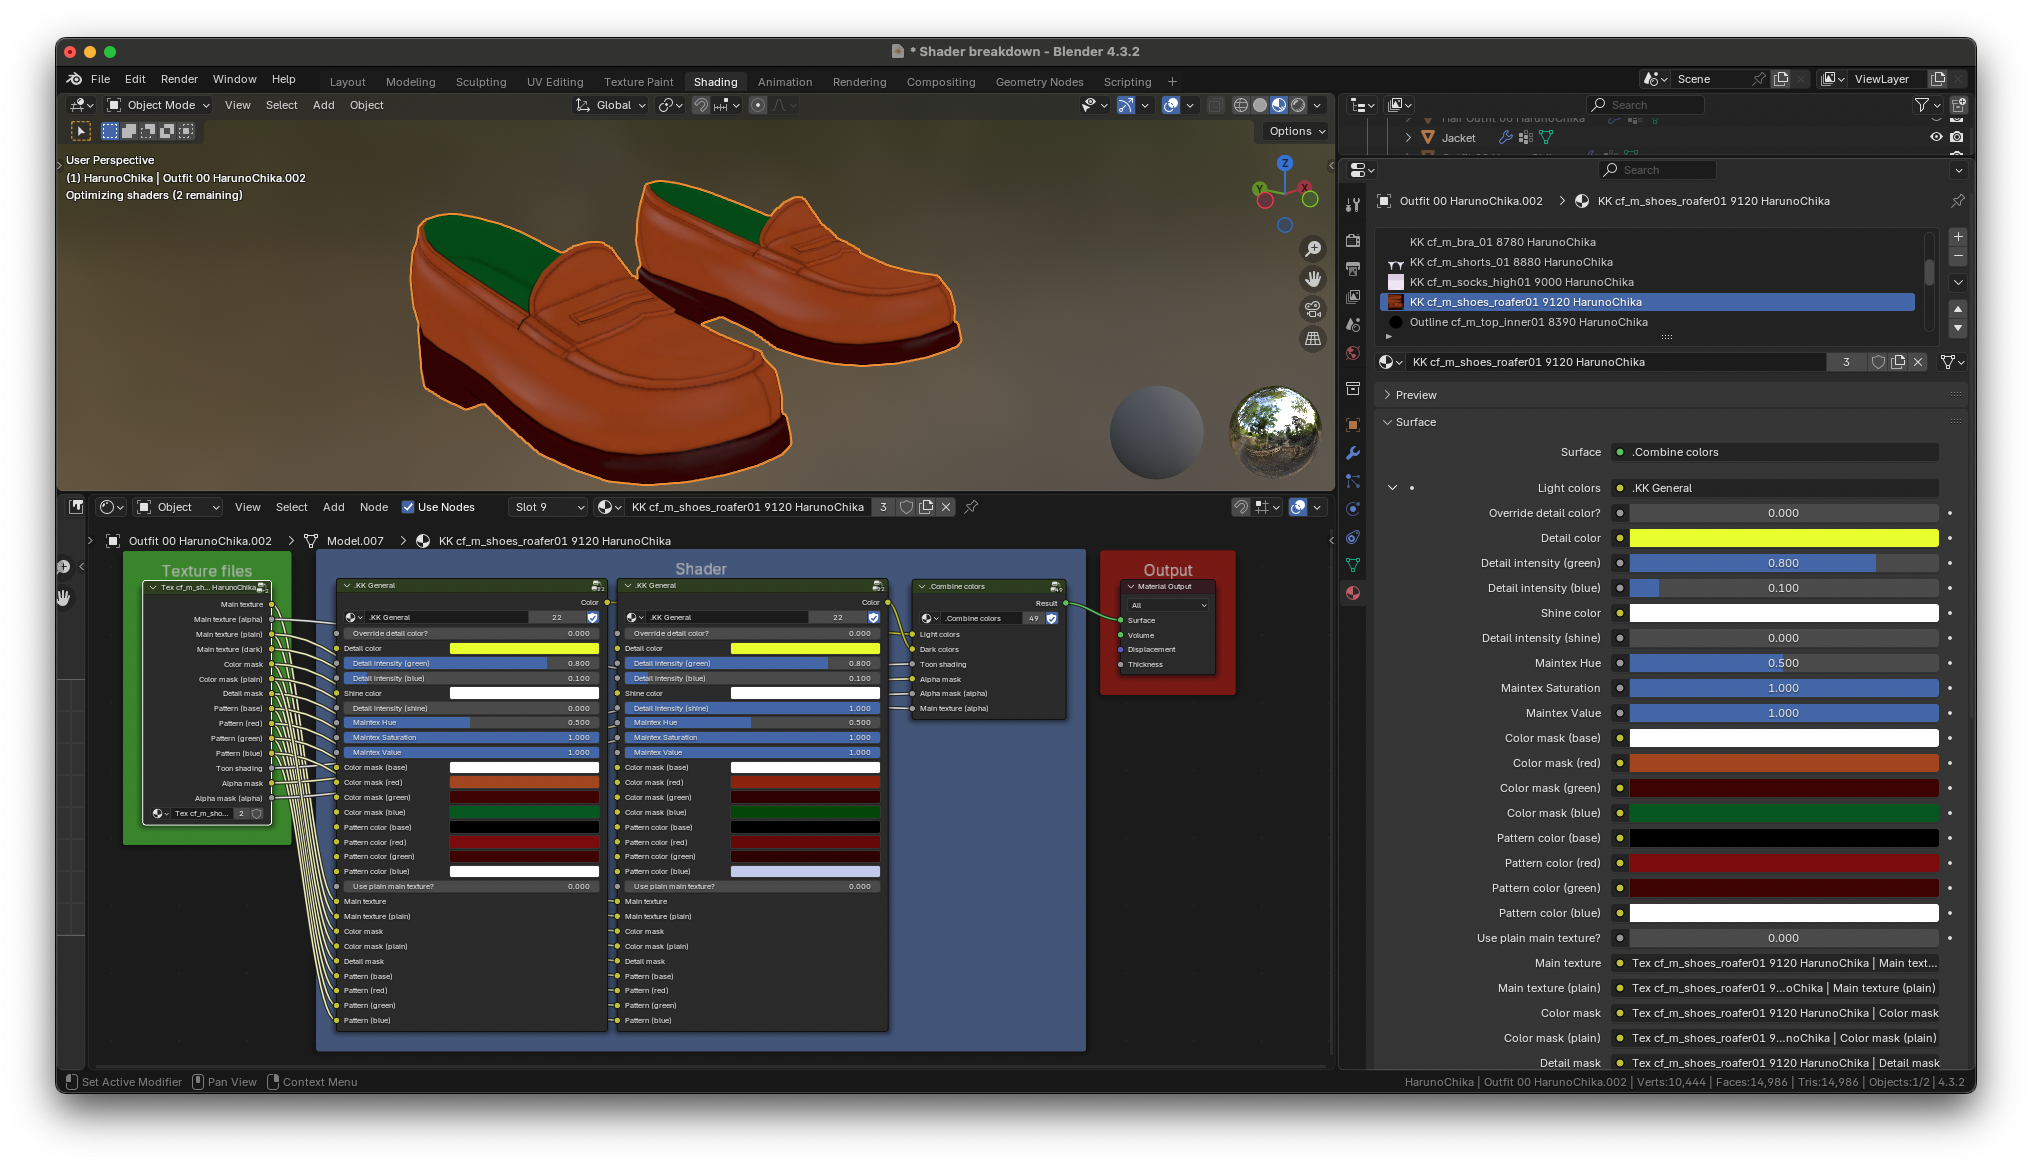
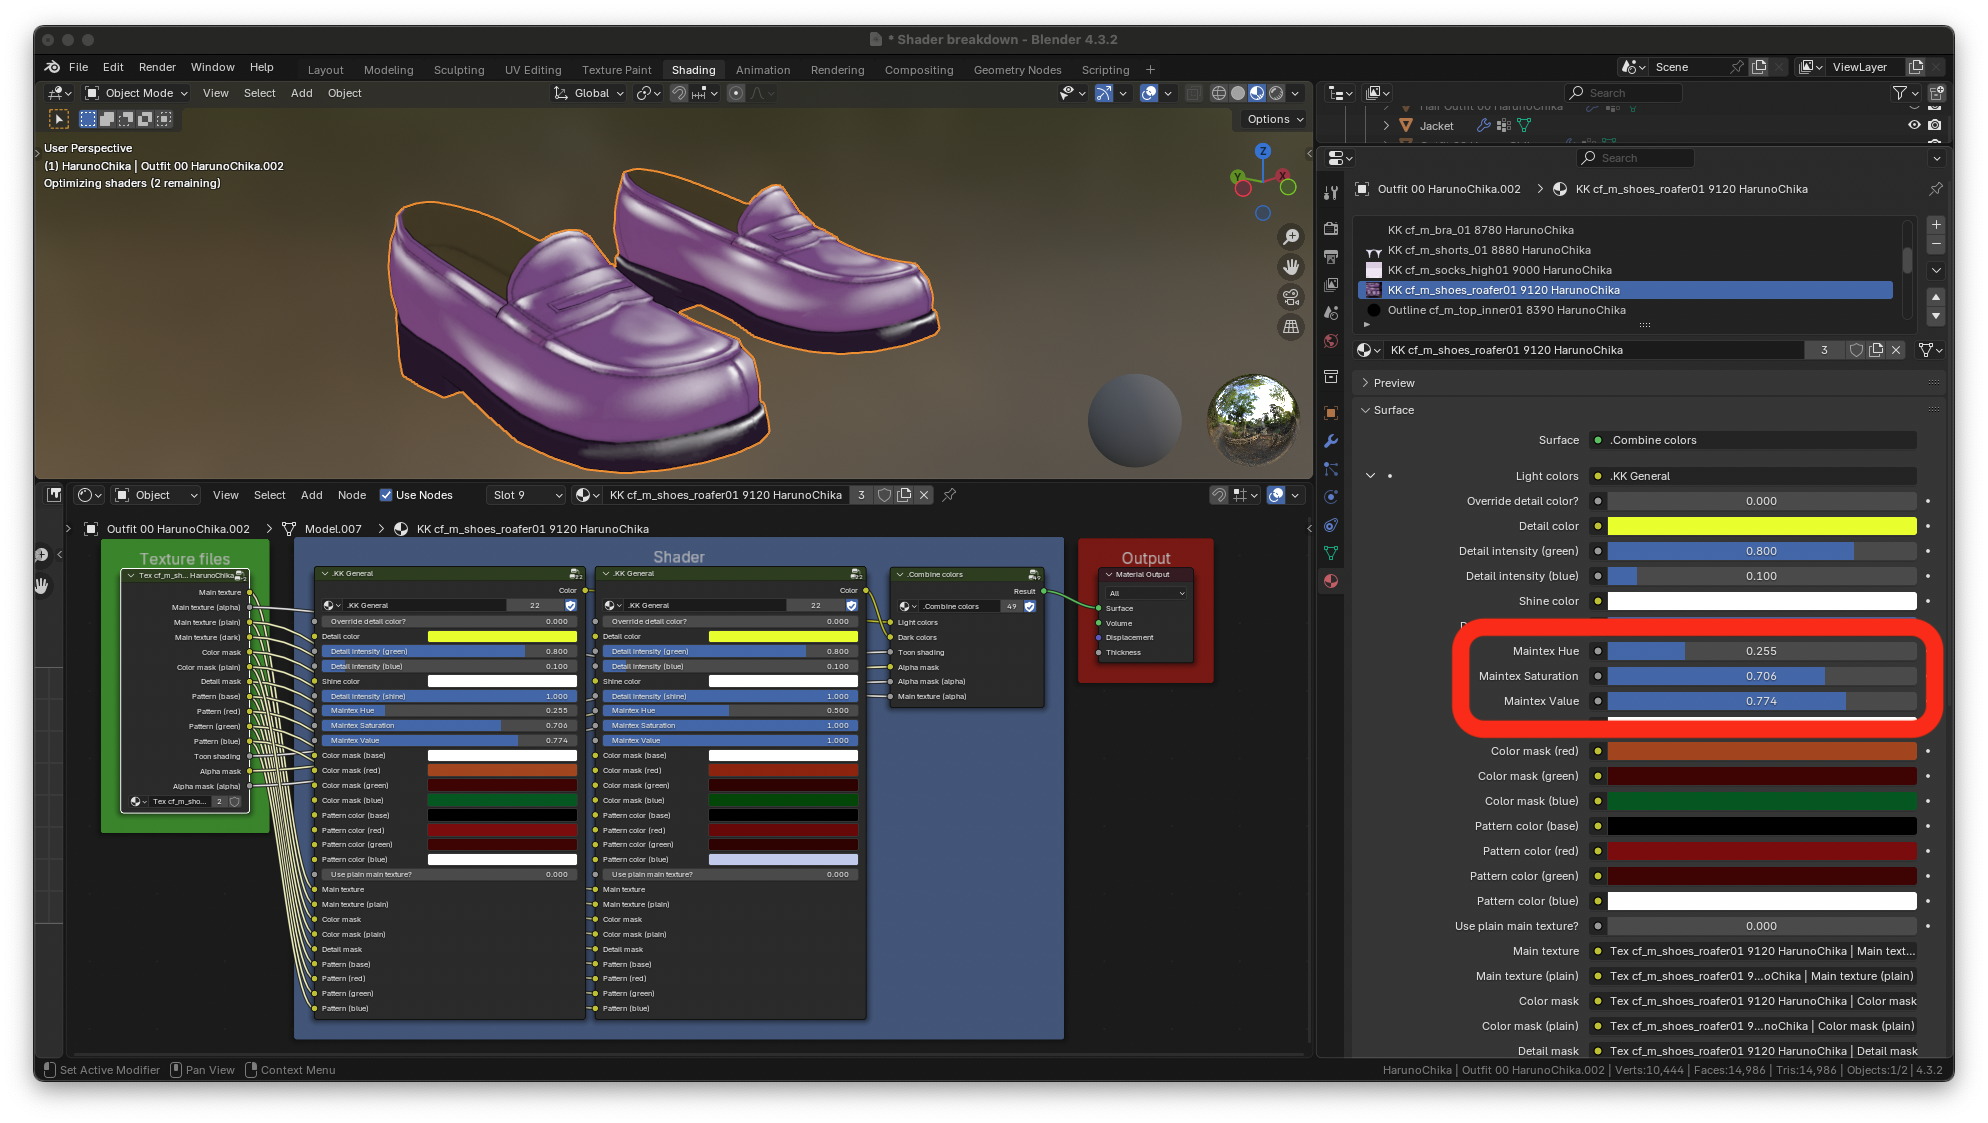
Maintex HSV
Most clothes have what is called a main texture or a maintex for short. The hue, saturation and value of the main texture can be easily adjusted with the maintex sliders. Here’s what the shoes look like with their HSV values adjusted
Color mask colors
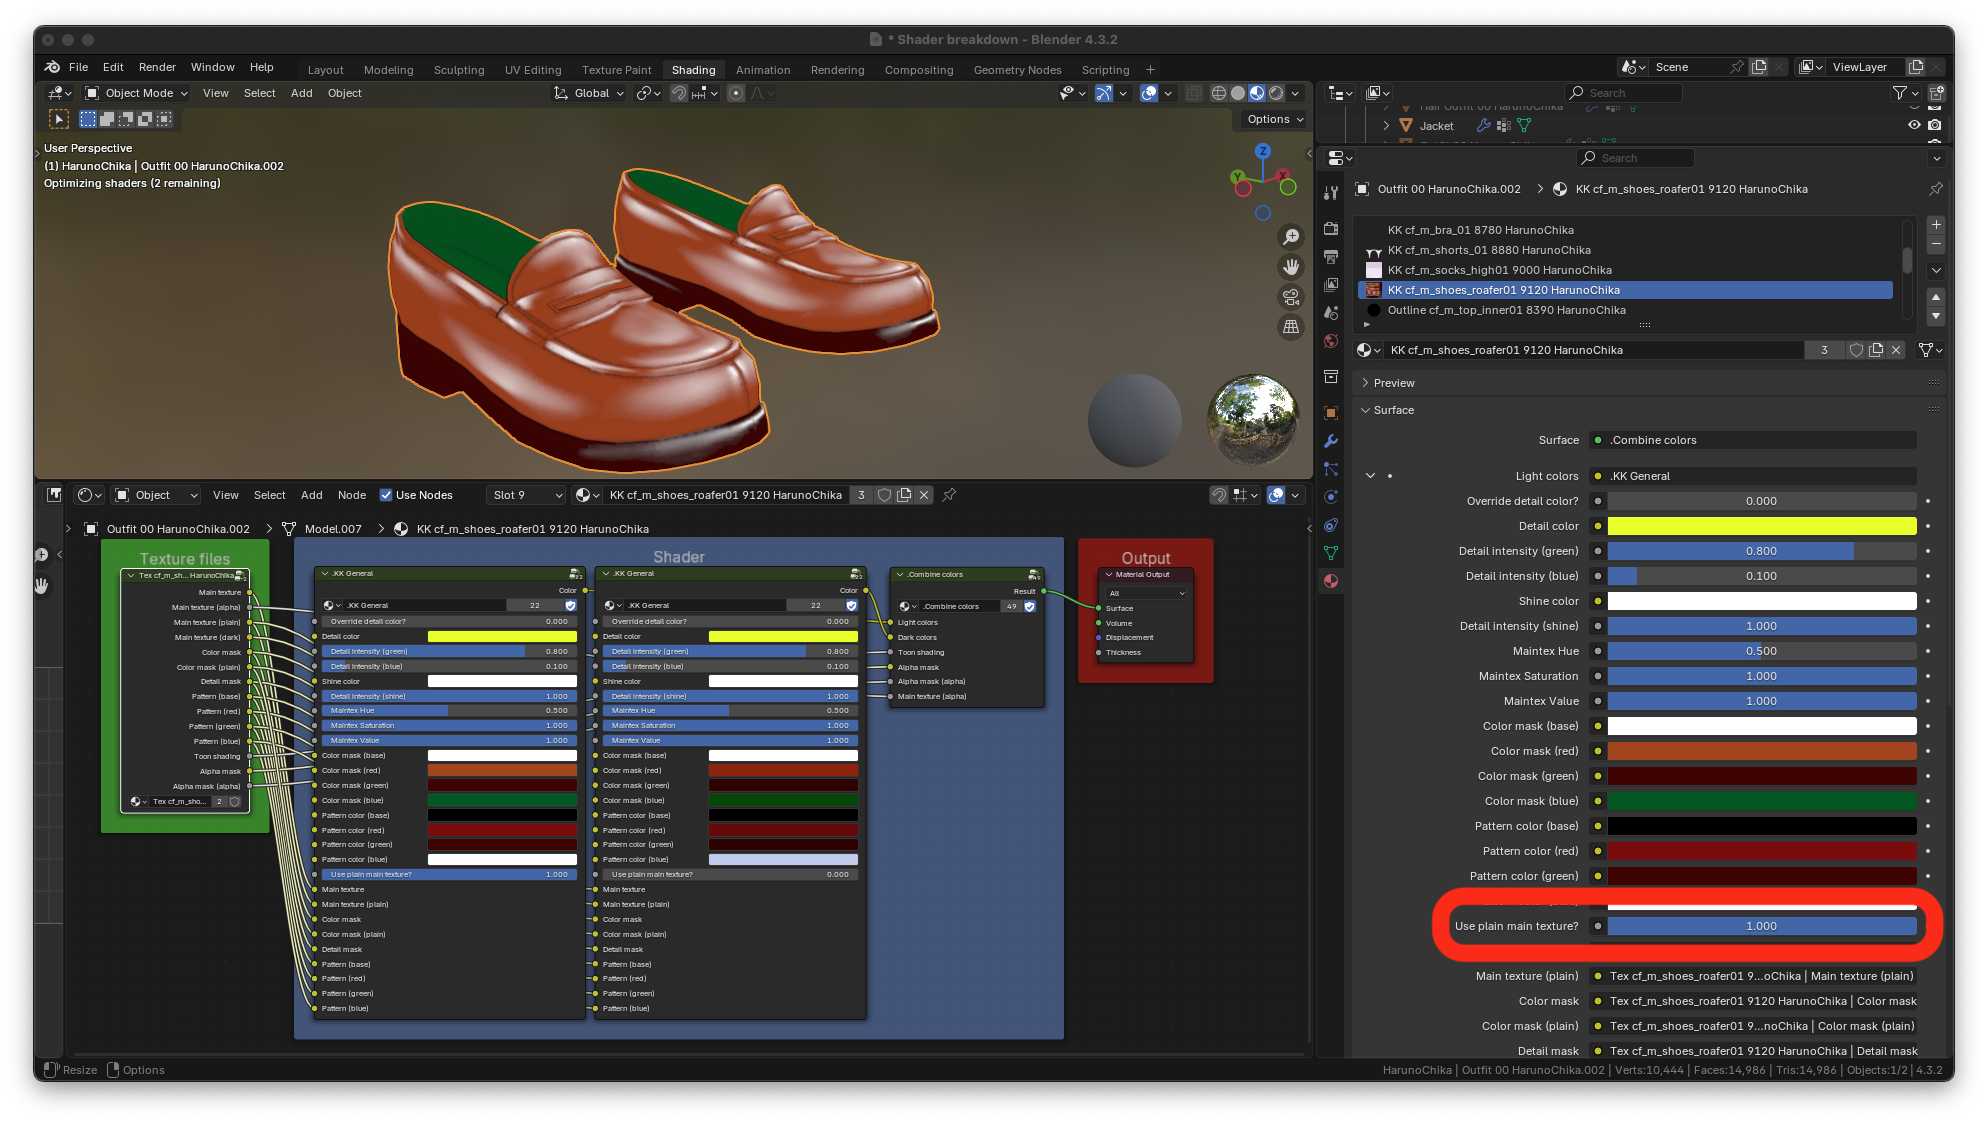
If a piece of clothing has a main texture, it will also have what is called a plain main texture. The difference between a main texture and a plain main texture will be explained later on. For now, all you need to know is that each color on every piece of clothing can be changed, just like in the game. In order to do this, the plain main texture must be enabled. The slider to enable the plain main texture is set to 1 in the picture below.
Once the slider is enabled, you can change the colors of the piece of clothing with the color mask color inputs. The color mask colors of the shoes are changed below.
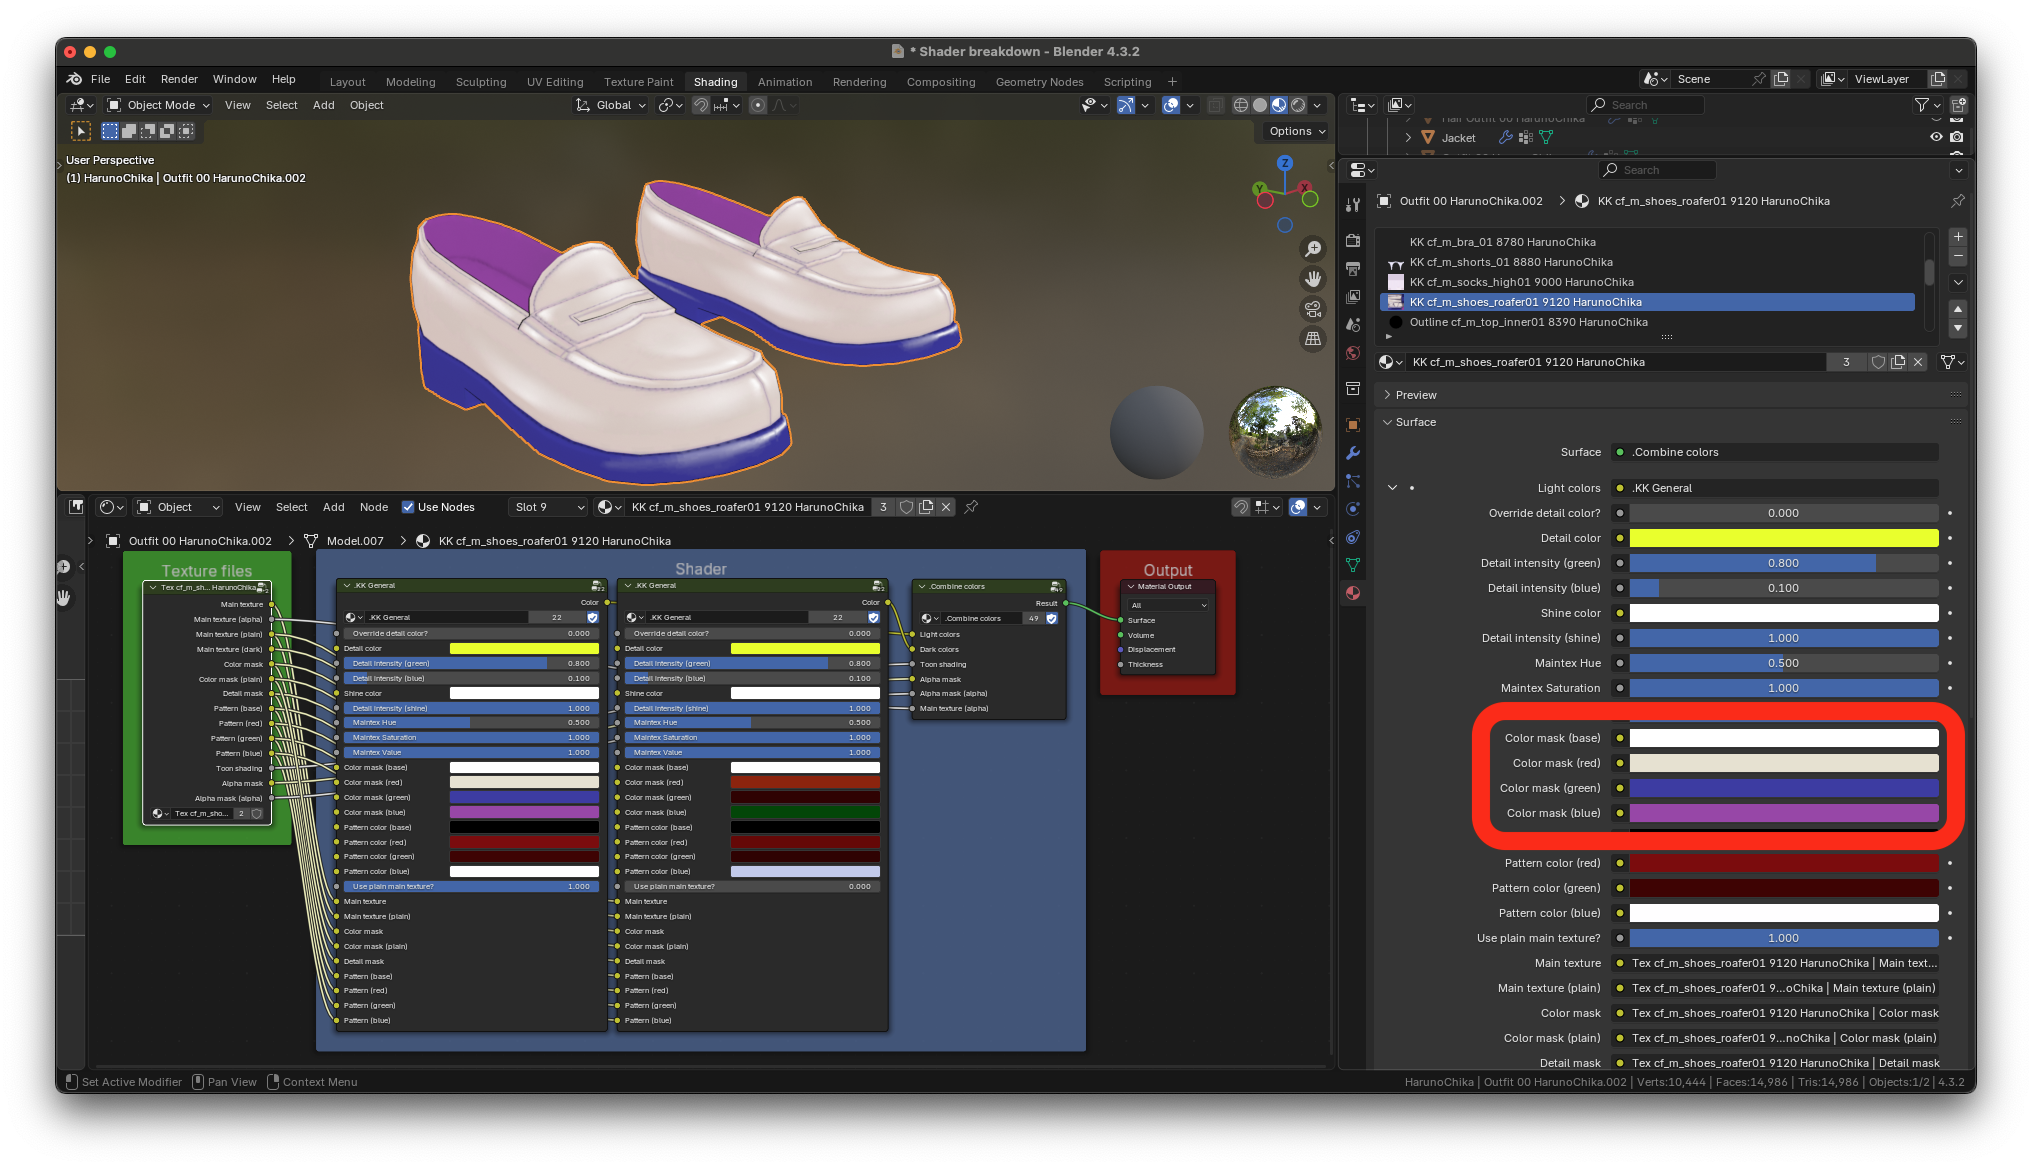
You can return to the original colors at any point by resetting the color mask colors to their original values. Or by disabling the plain main texture slider again (thus, the regular main texture will be used again).
Pattern colors
Some clothing like the default skirt have pattern colors that can be adjusted. In order to adjust the pattern colors, you need to use the plain main texture. The picture below shows the plain main texture slider enabled for the skirt.
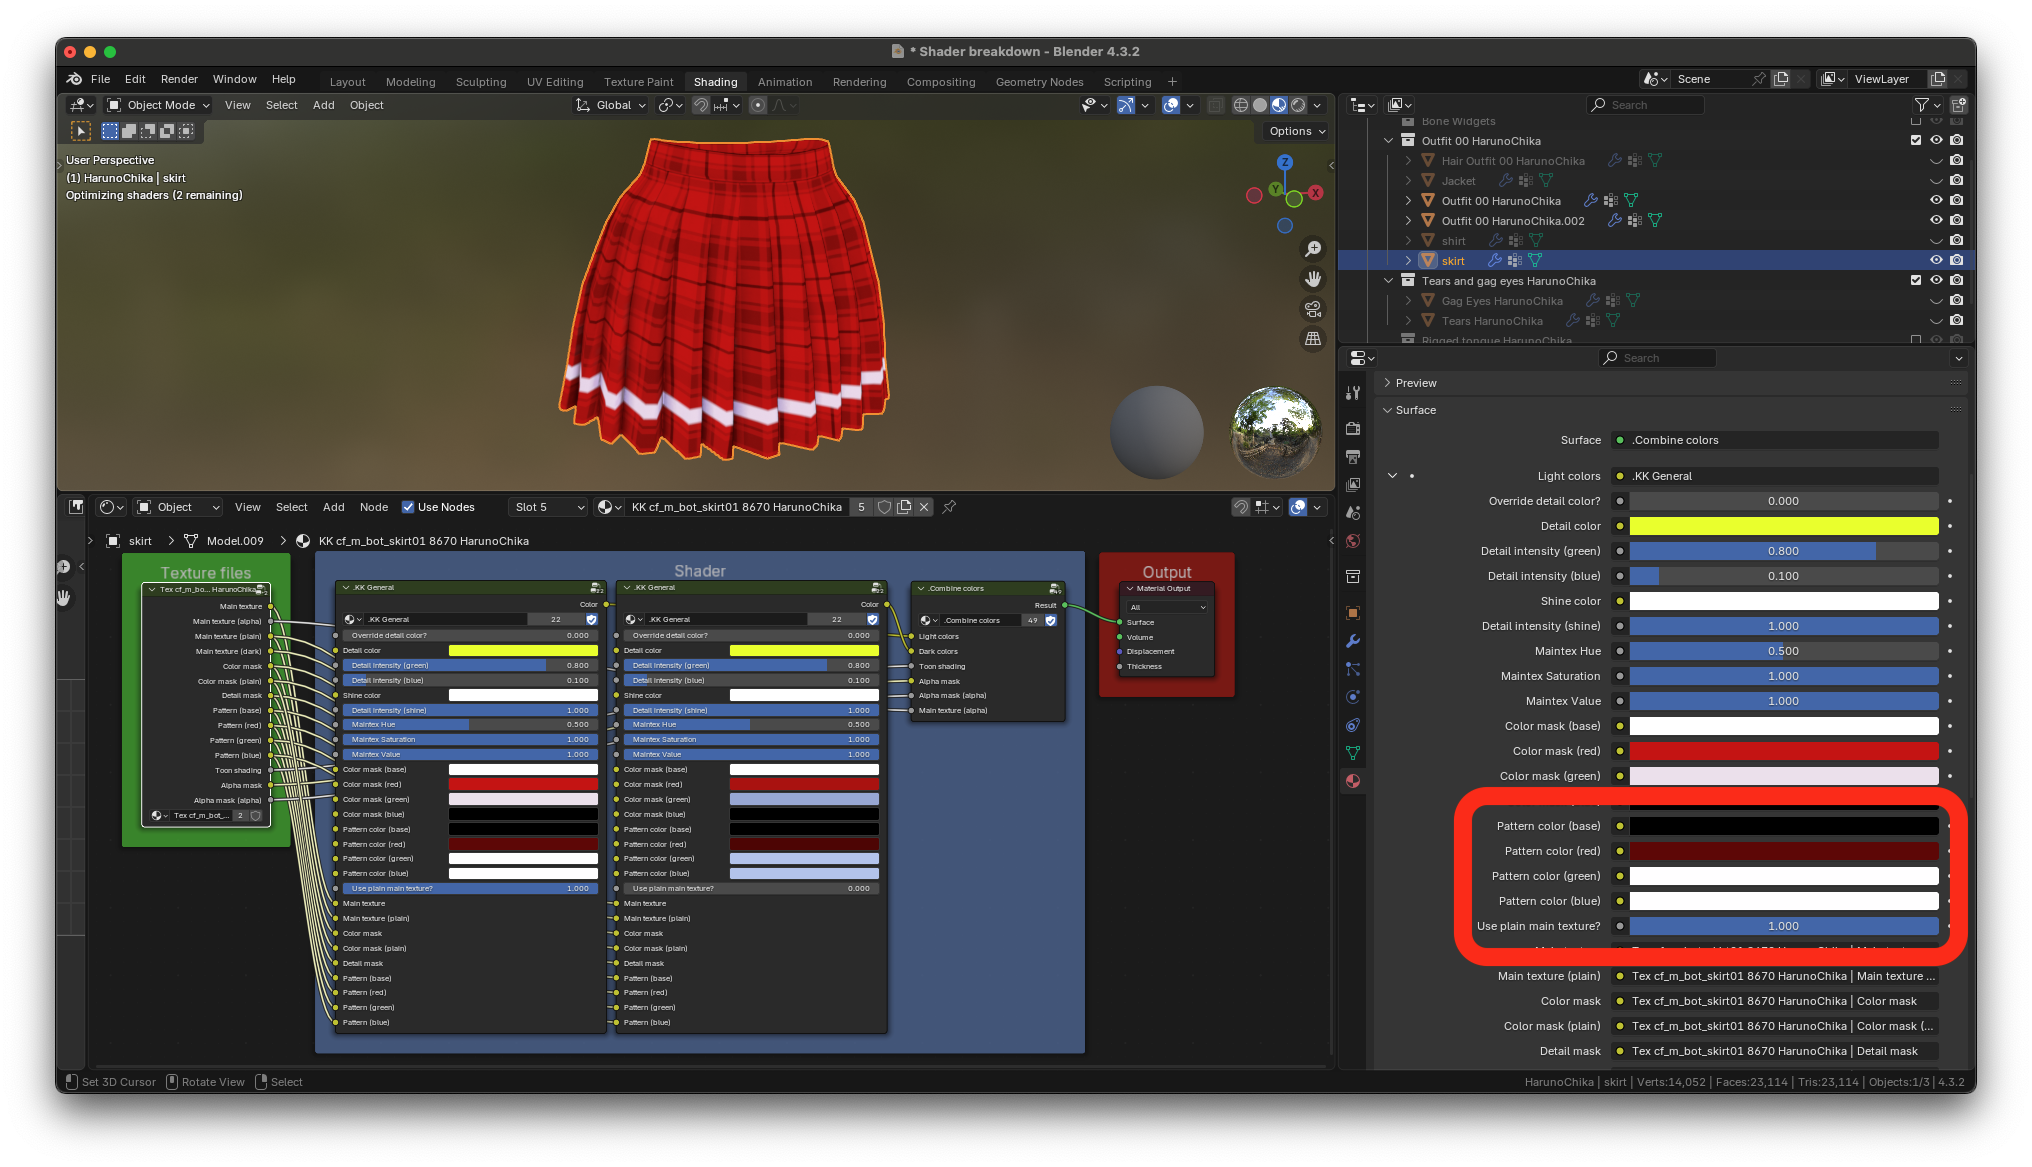
The default skirt only has one pattern color that can be adjusted. Here’s what it looks like with the pattern color set to blue.
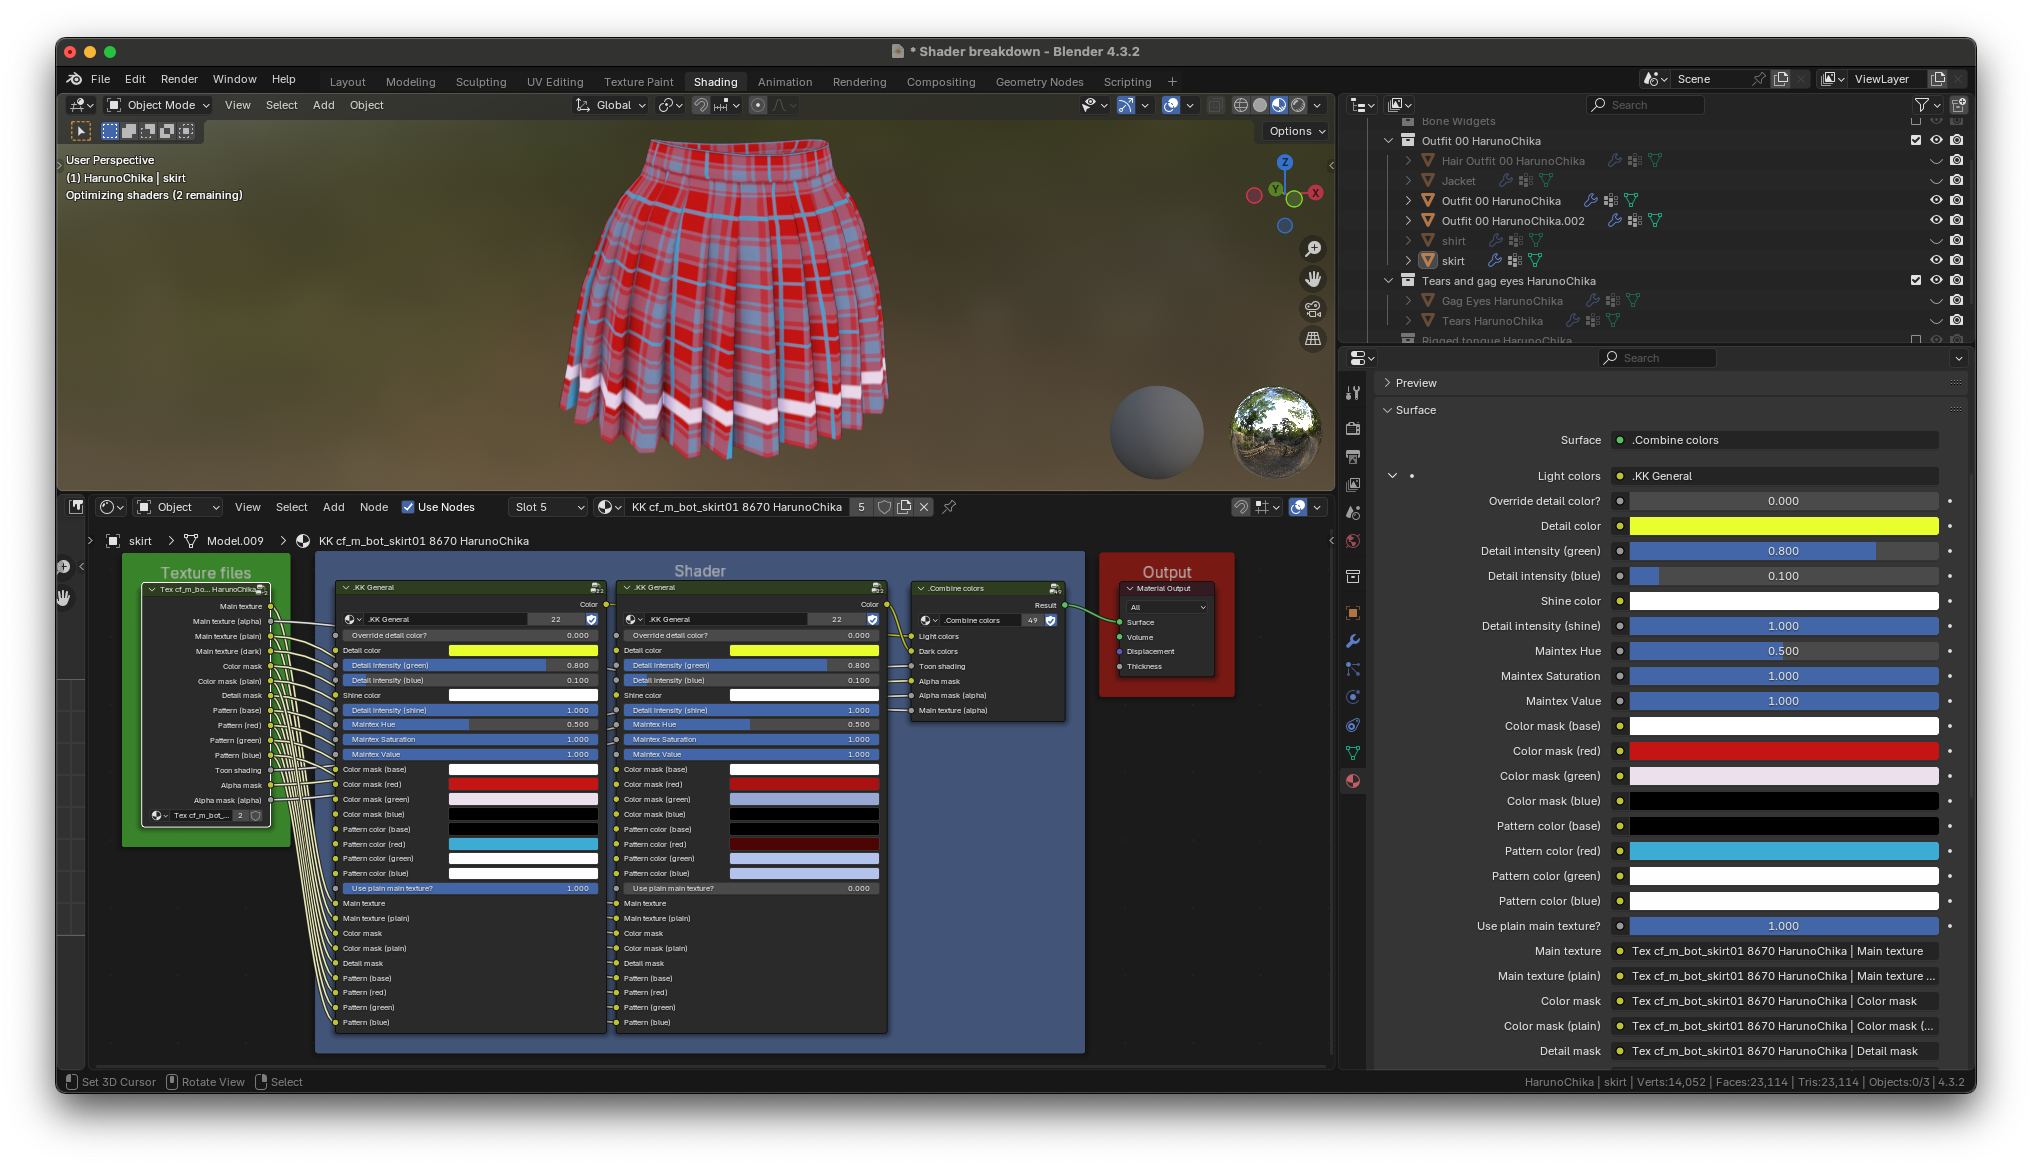
If this piece of clothing had more patterns, their colors would be adjusted with the pattern color green and pattern color blue color inputs
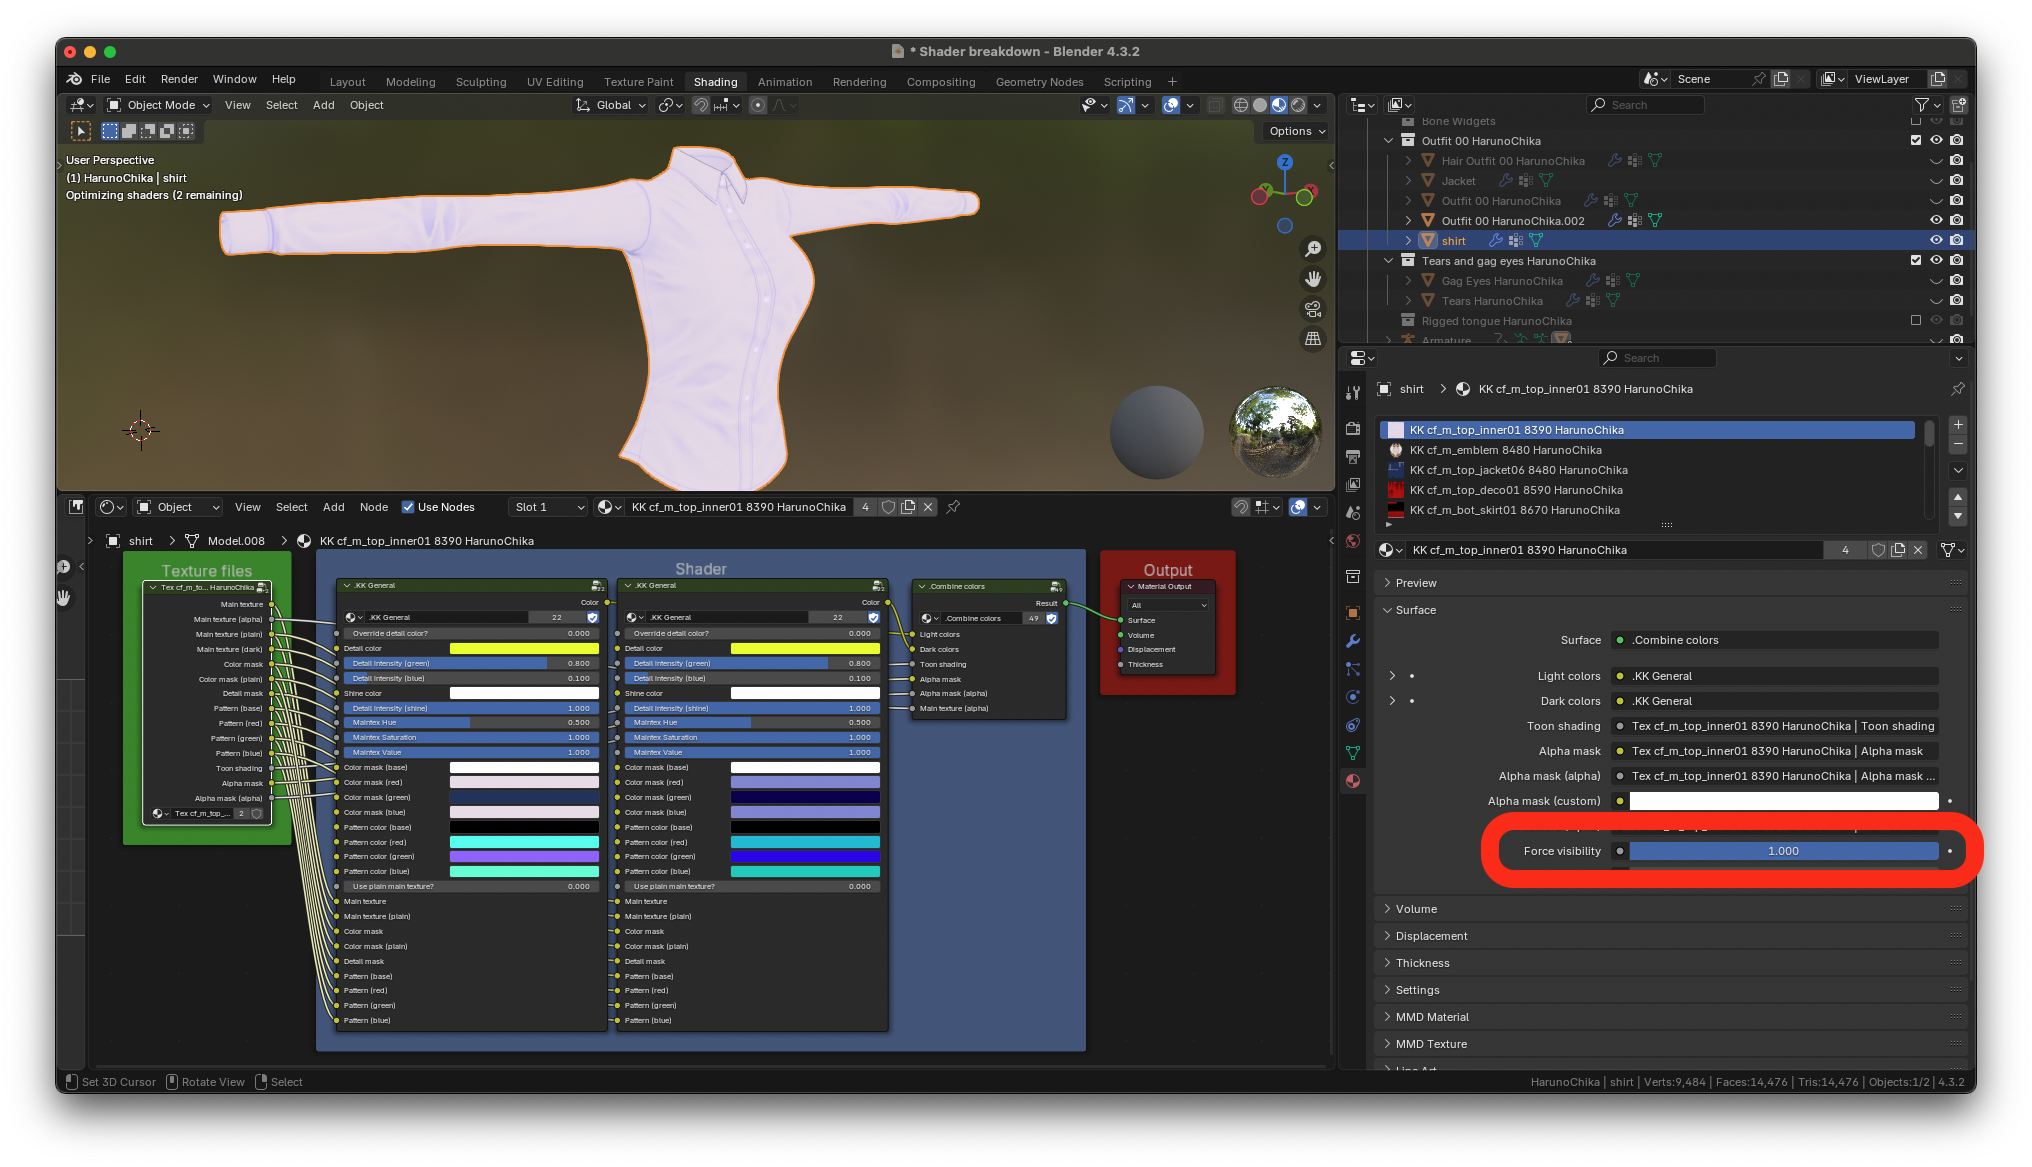
Visibility slider
Some pieces of clothing have what is called an alpha mask. The alpha mask hides certain parts of clothing to prevent it from clipping through other clothing. The default inner shirt is an example of a piece of clothing that has an alpha mask
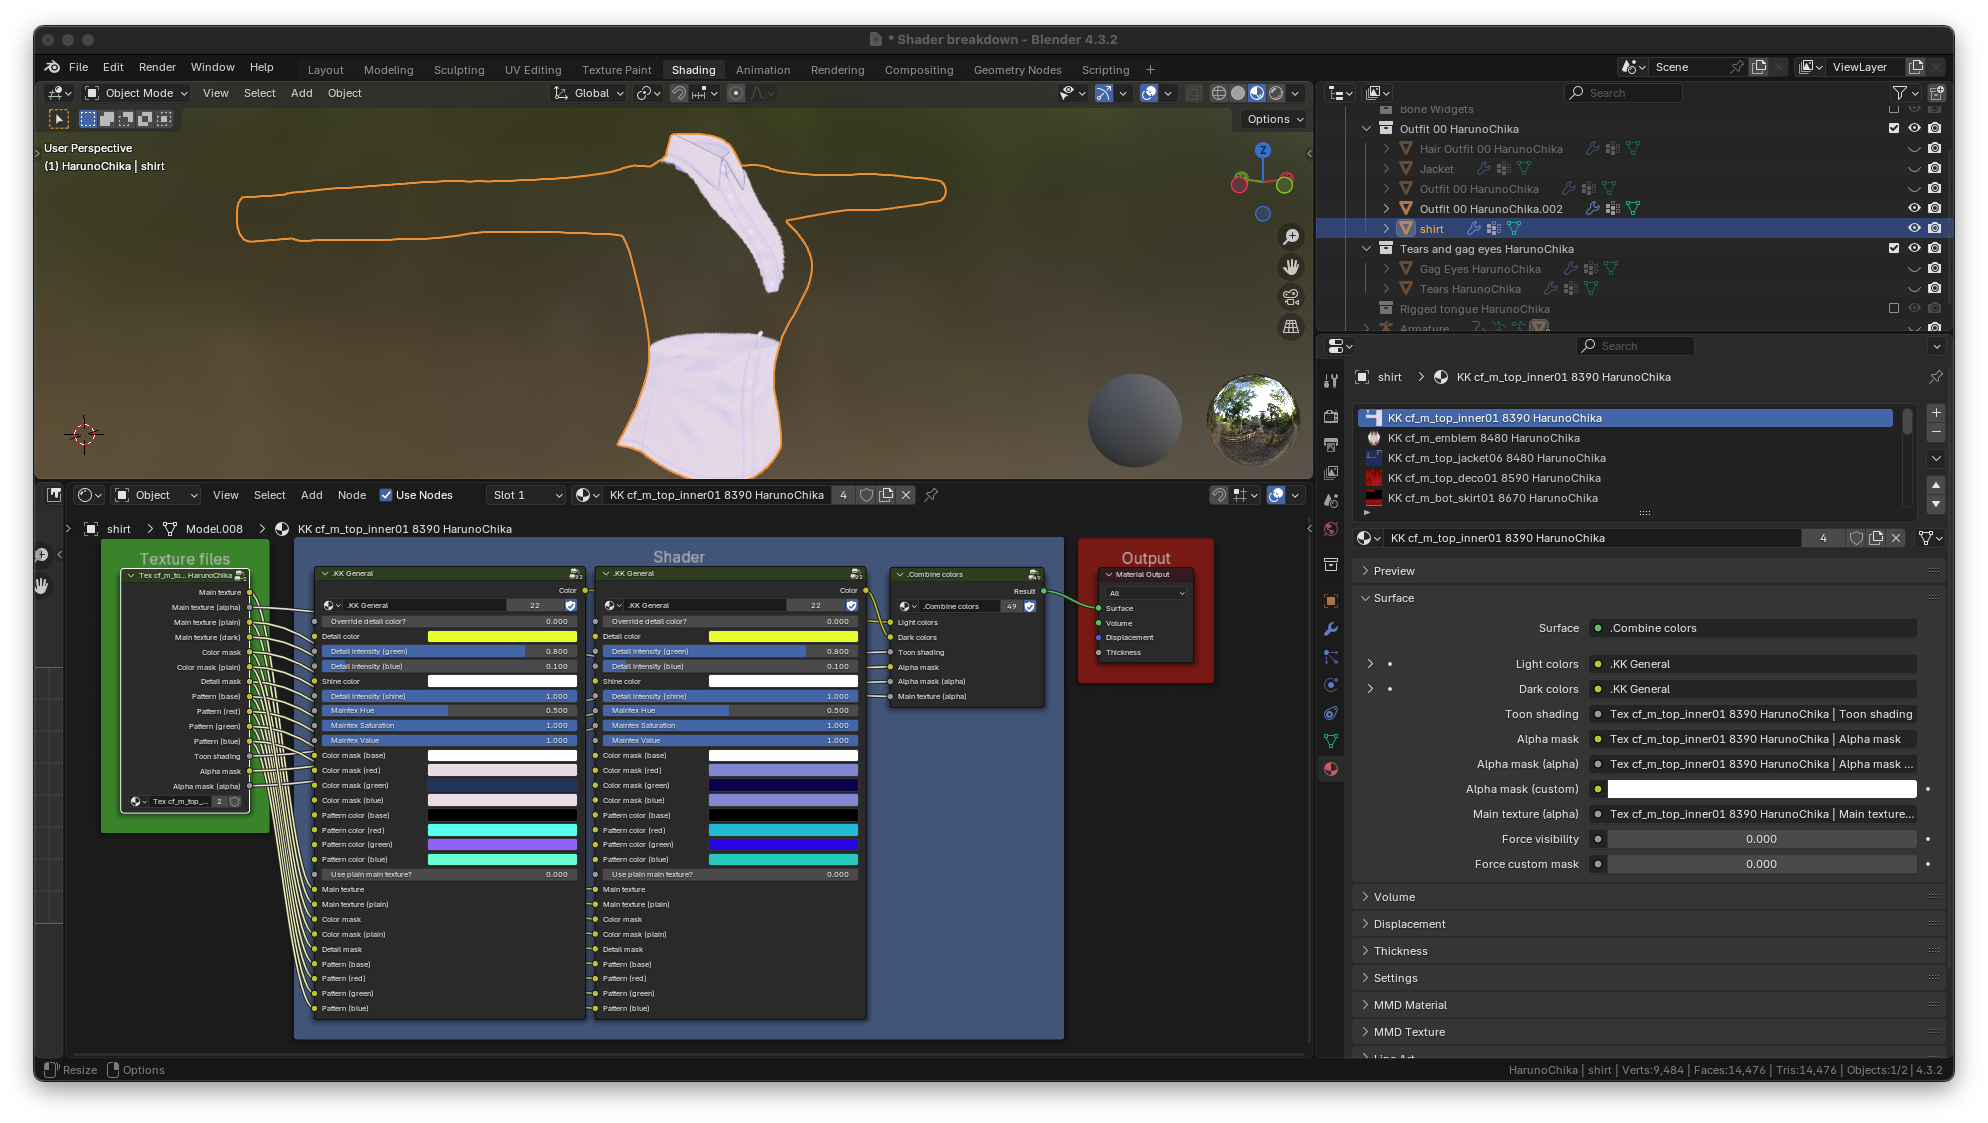
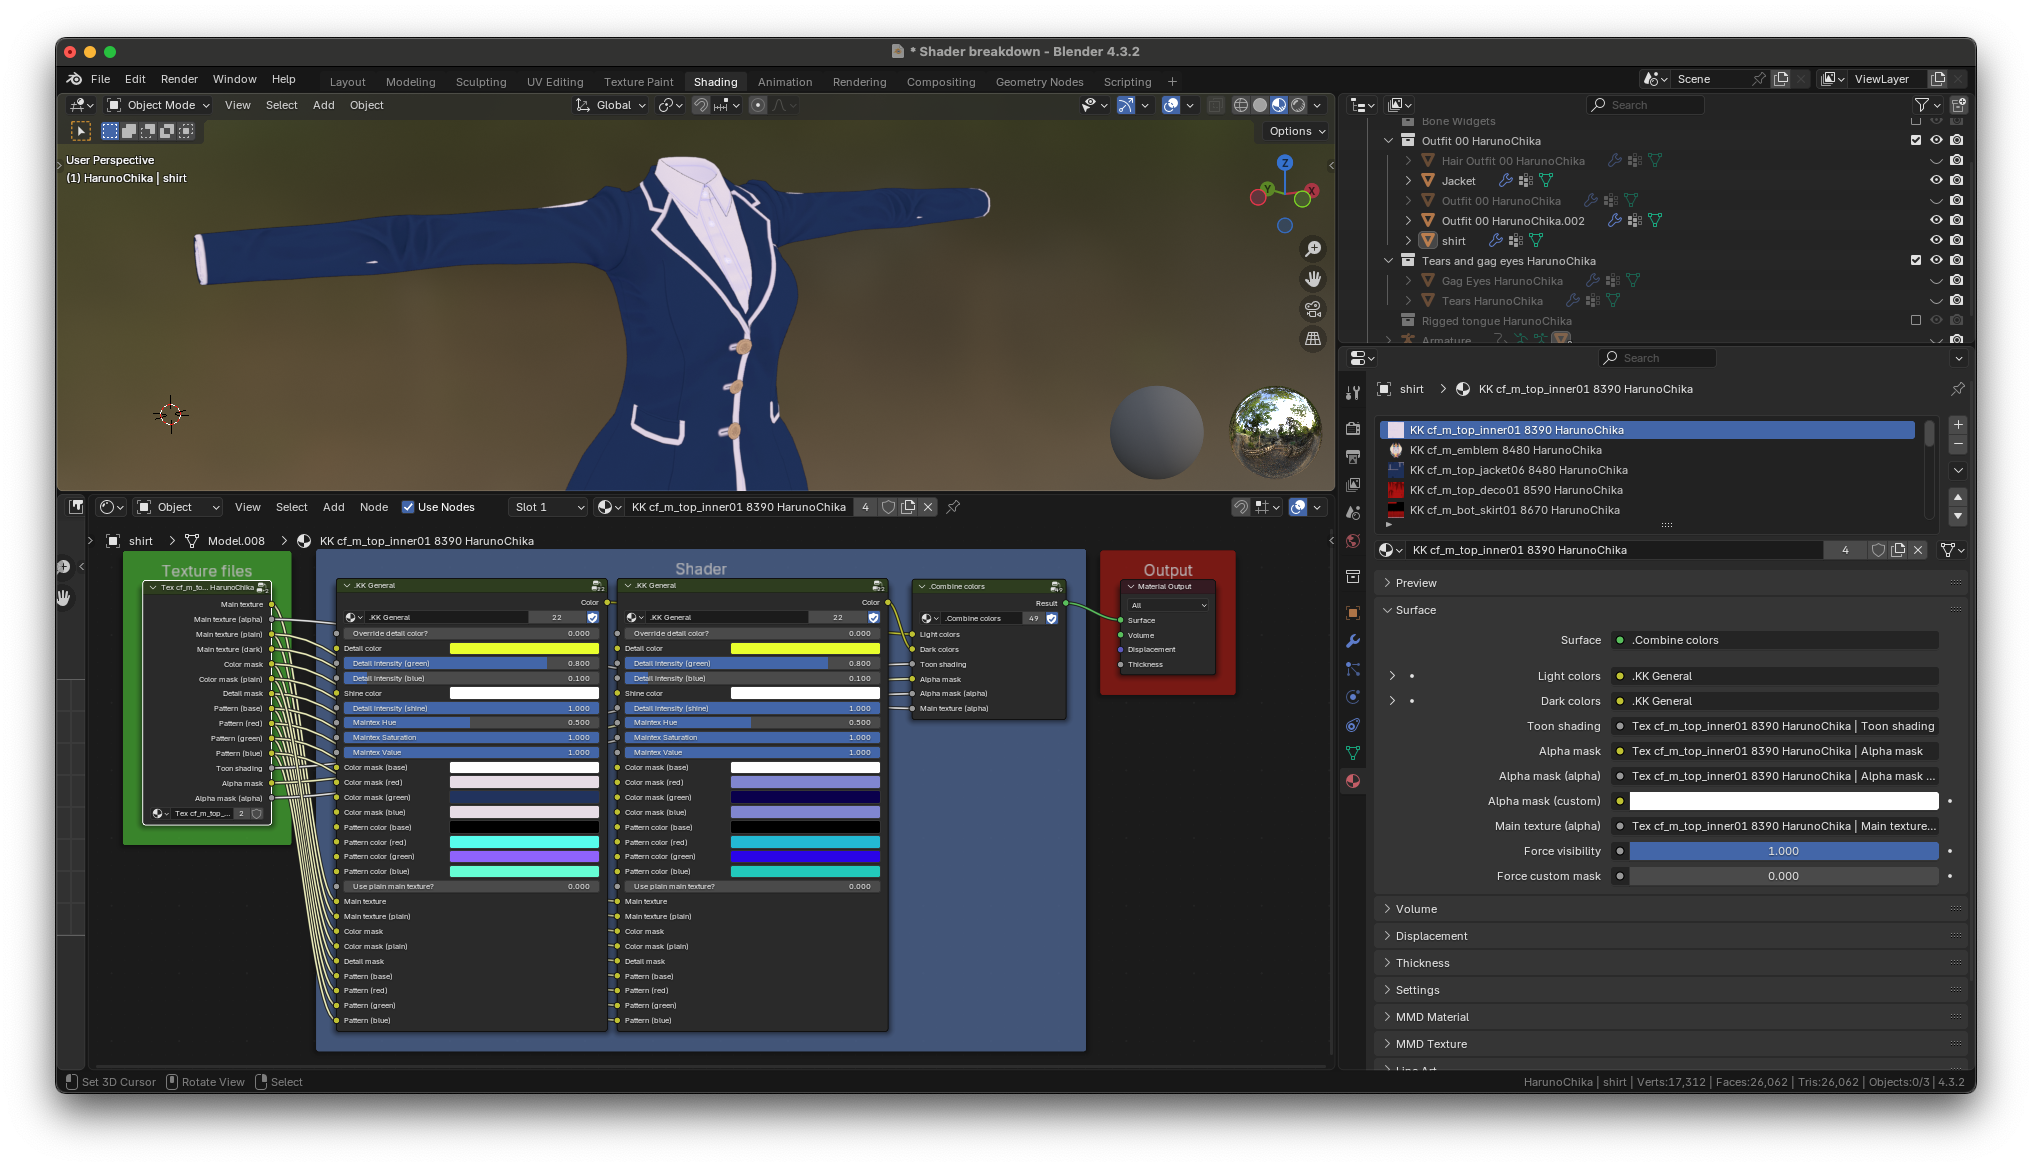
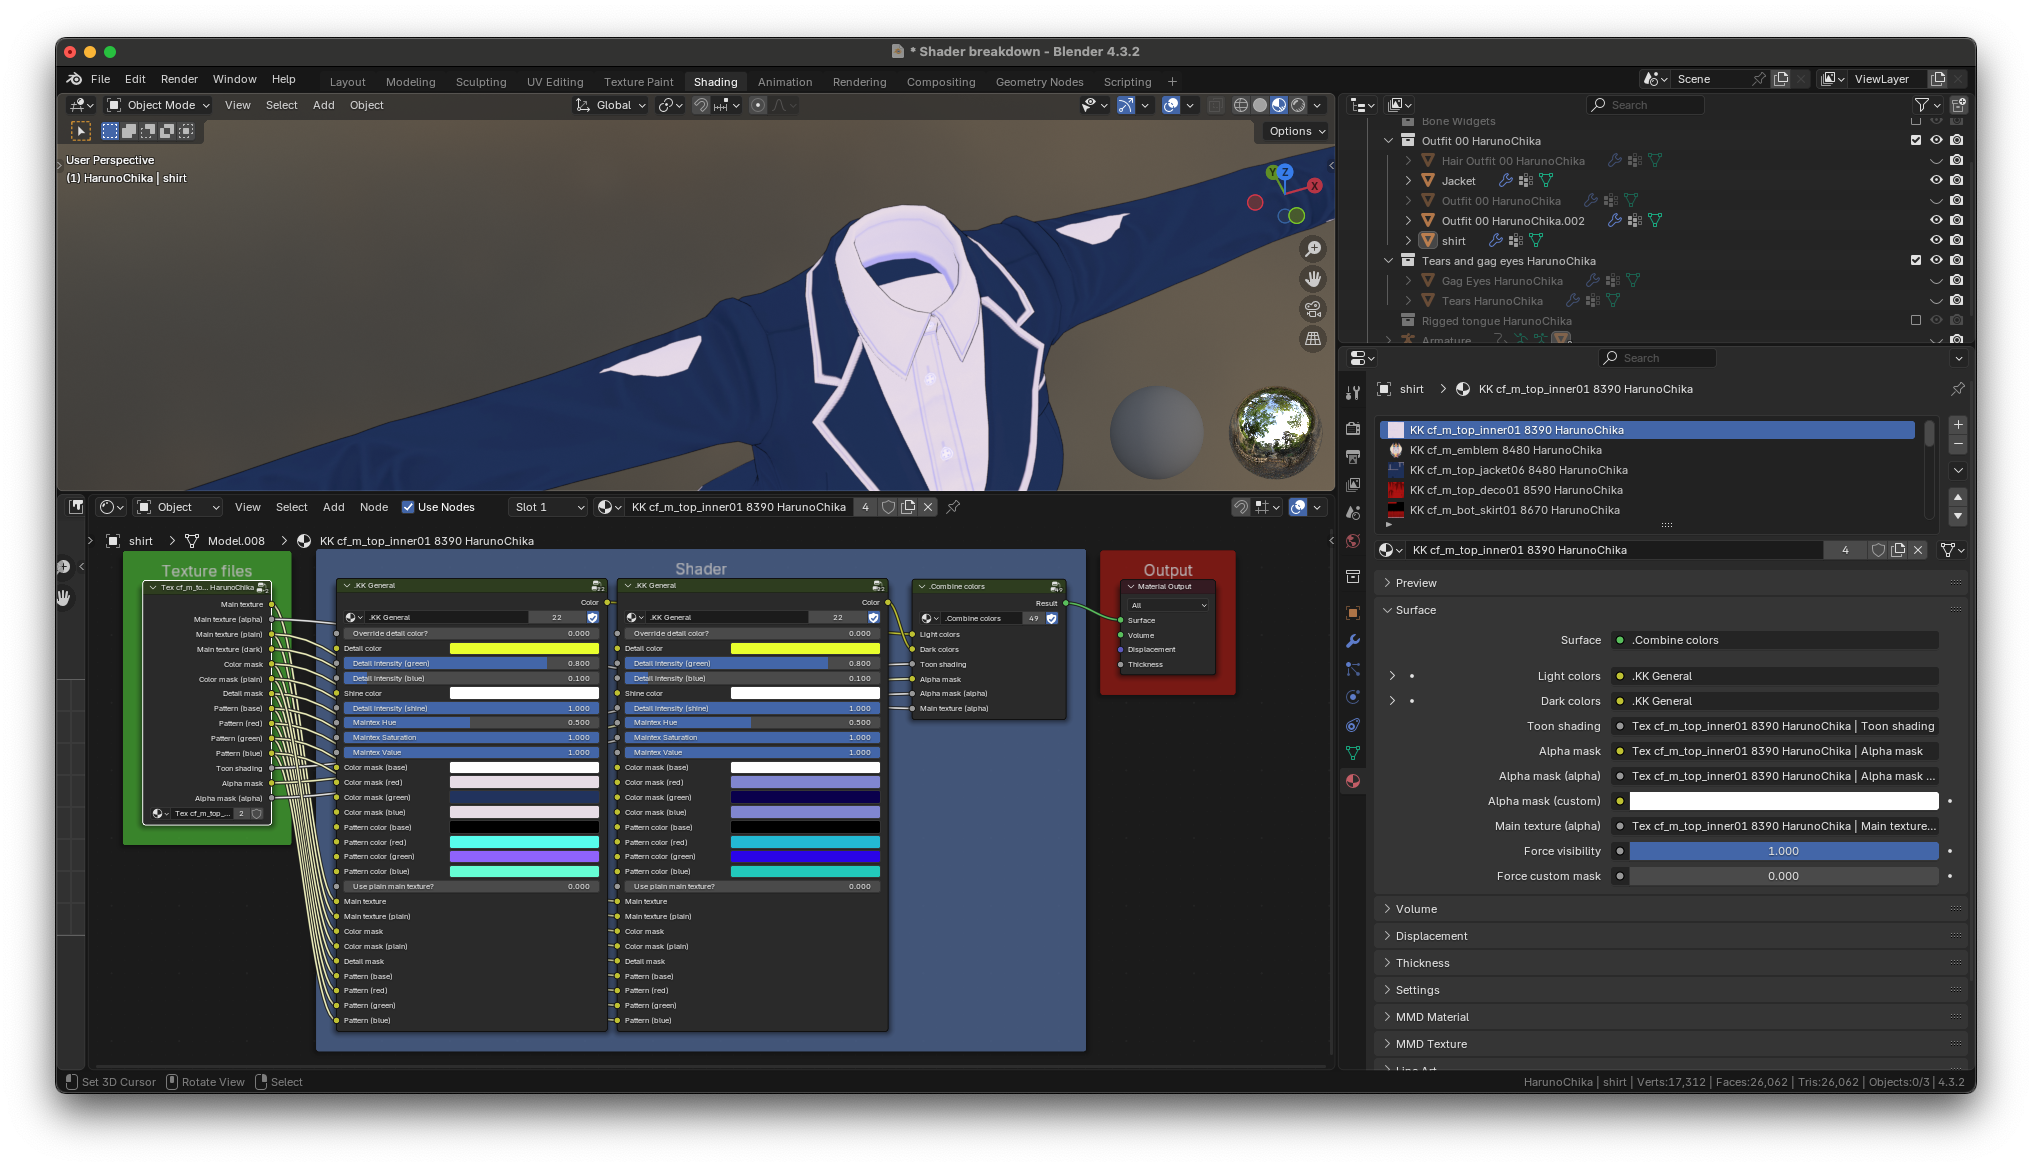
Portions of this clothing are hidden to prevent it from clipping through the jacket. If you want to make the clothing visible anyway, even though it shouldn’t be, you can enable the force visibility slider. Here’s what the shirt looks like with the slider enabled.
And here’s what the shirt and jacket look like with the shirt fully visible. Notice that some parts are clipping through the jacket when they shouldn’t be. That’s why the alpha mask is enabled by default.
In-depth shader breakdown
That concludes all basic clothing options.
If you are part of the 0.5% and none of these helped fix the material you’re having issues with, you can check the in-depth shader breakdown page for even more information on the KKBP “KK General” shader.